Managing users
In this tutorial, we’ll show you how to add, delete, edit and disable users in the Salus Suite.
Only Organisation Admins can manage users and groups.
Add a user
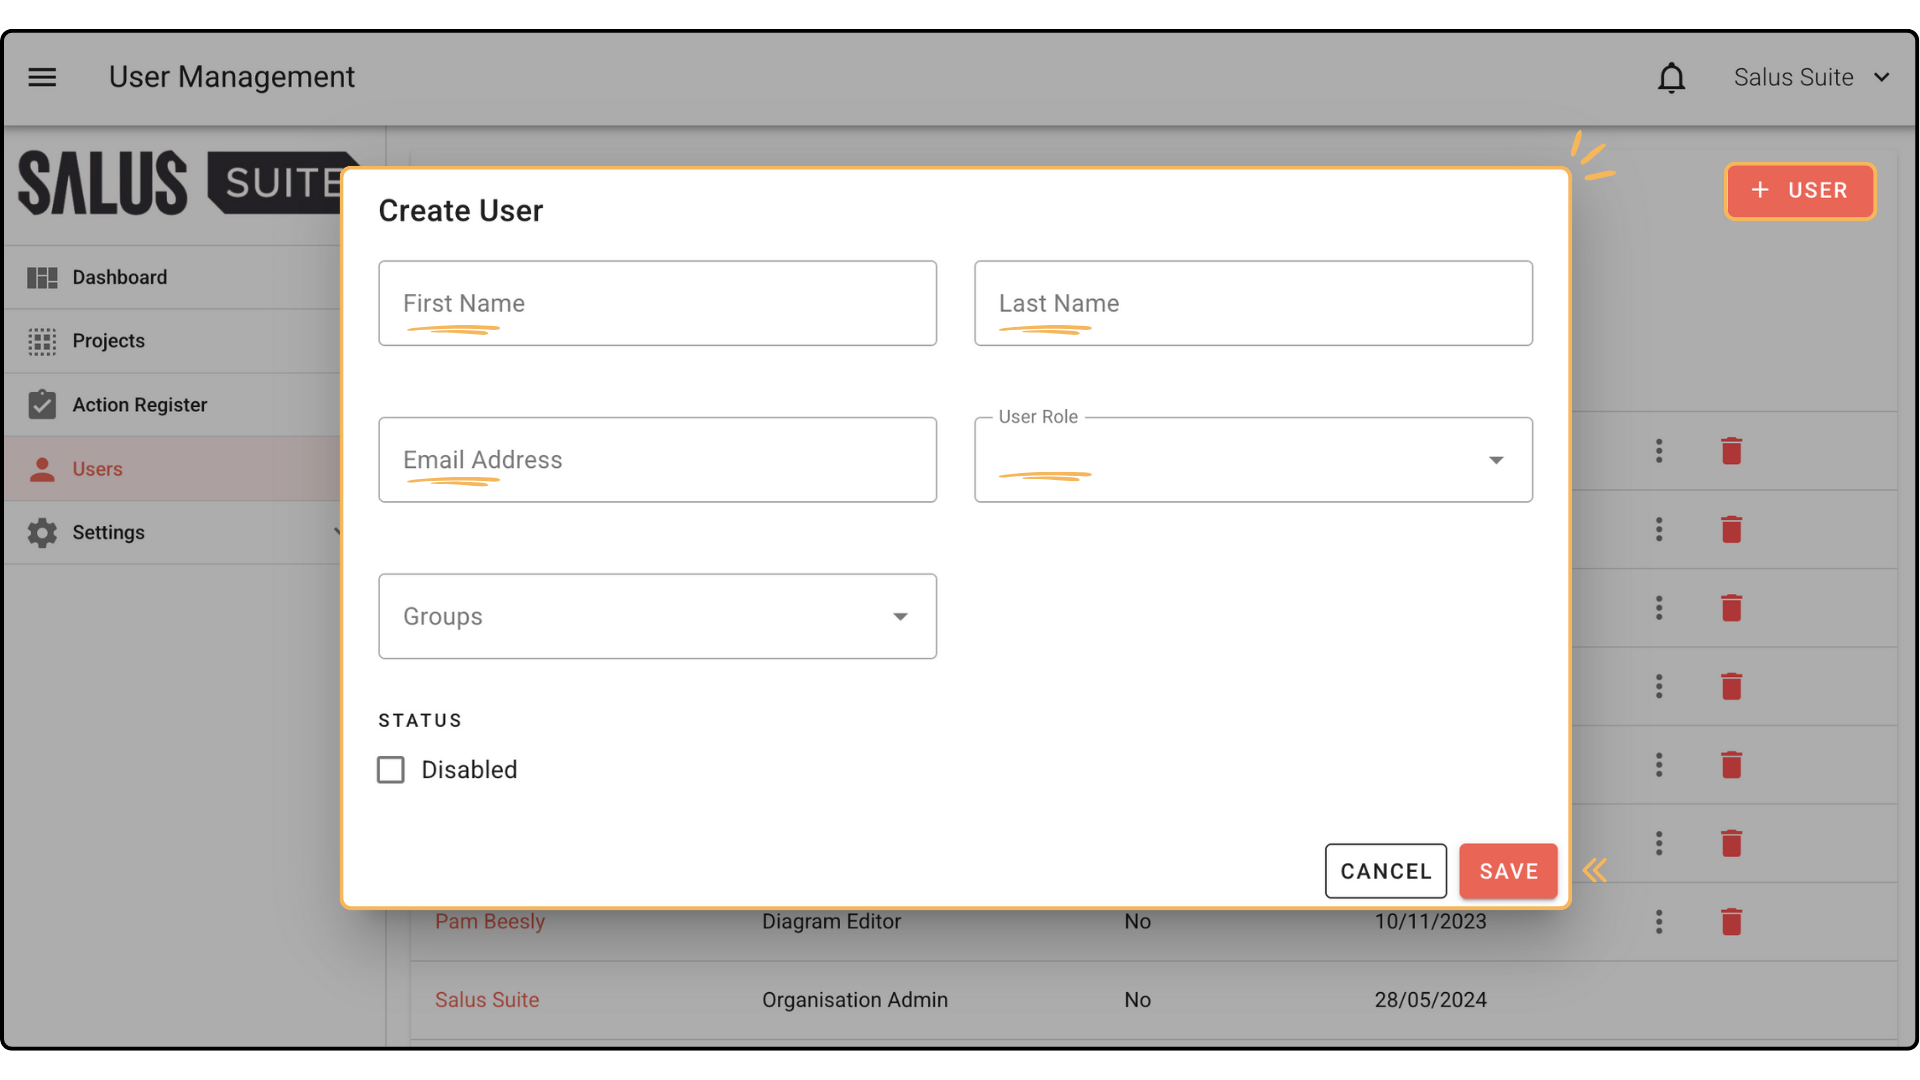
Step 1: Go to Users in the left-hand menu, then click + NEW USER.
Step 2: Complete the required fields and choose the user’s role (Viewer, Metadata Editor, Diagram Editor or Organisation Admin) in the User Role dropdown. Click SAVE.
Delete a user
Step 1: On the user row, open the menu and select DELETE USER.
Step 2: Confirm the deletion. The user is permanently deleted and every reference to them across the system shows as “Deleted User”.
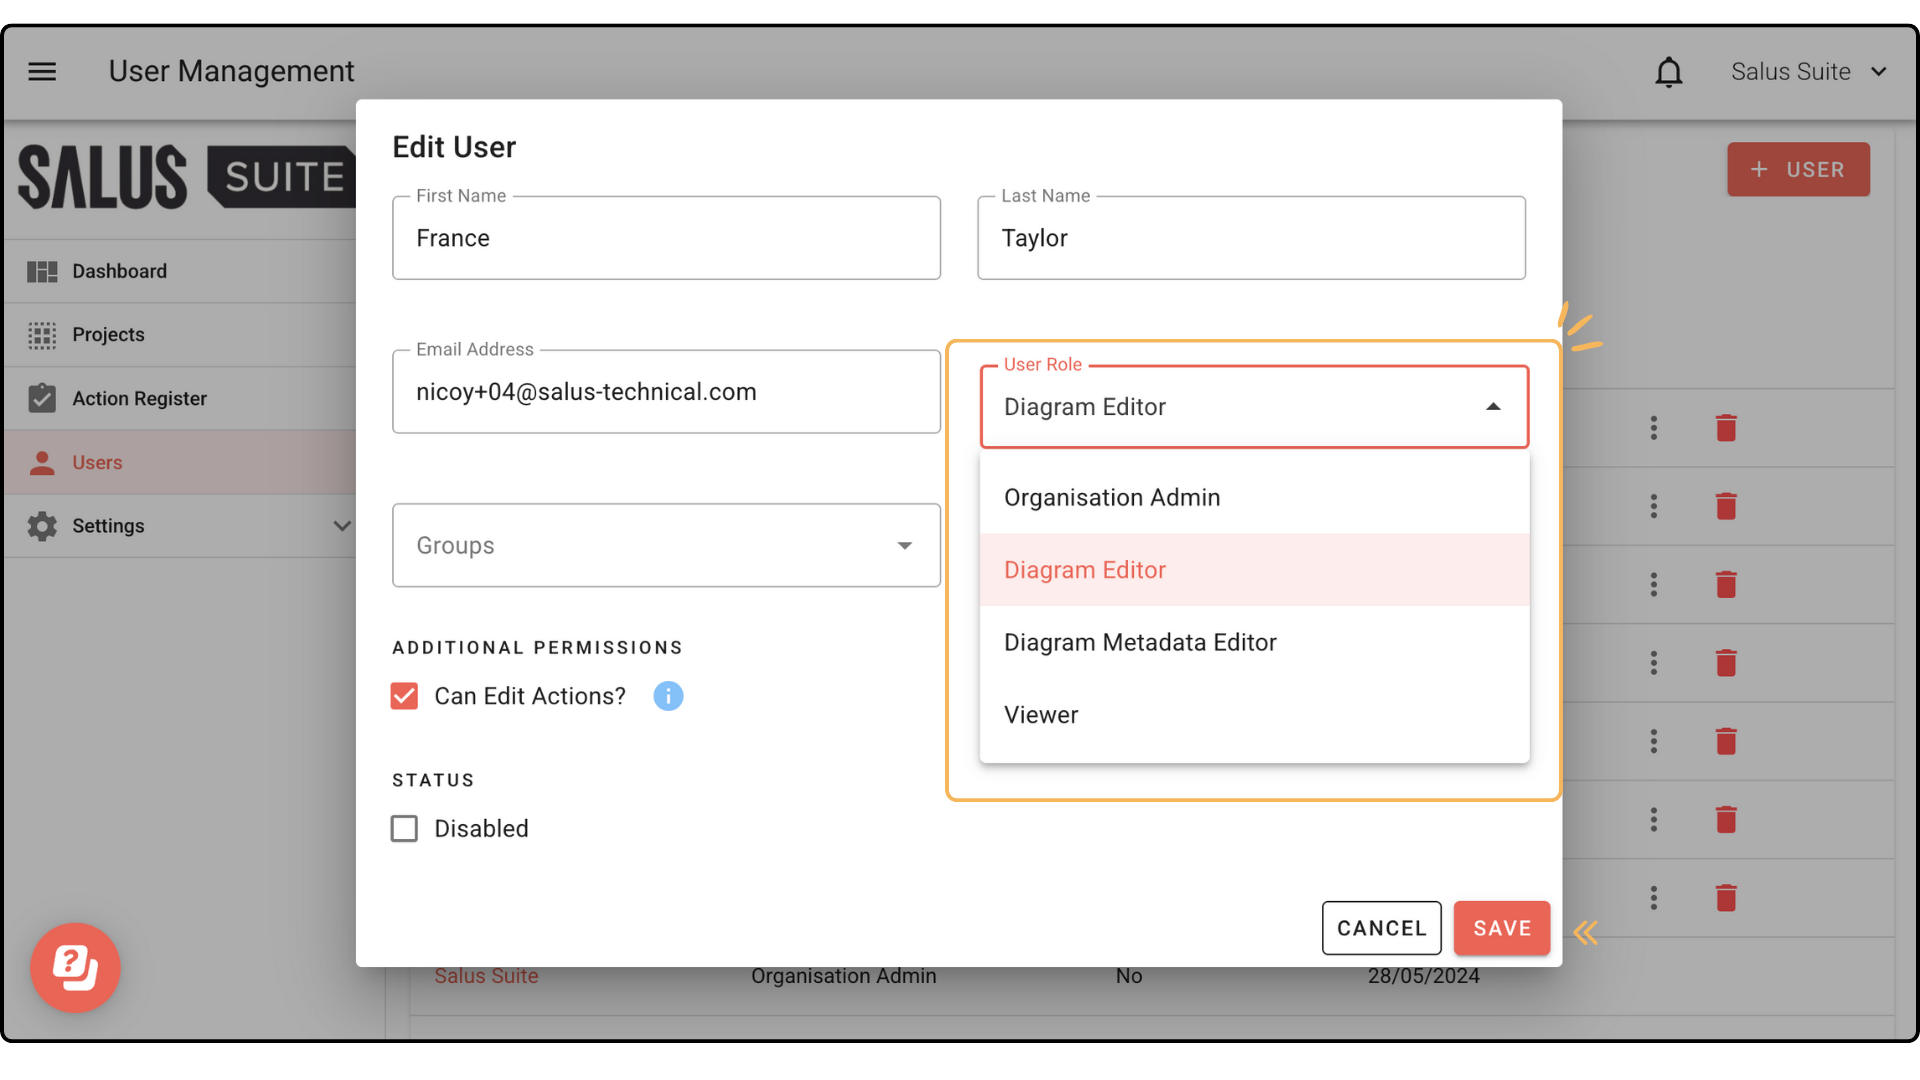
Change a user’s role
Step 1: In the Users menu, click the user you want to edit.
Step 2: Select a role in the User Role dropdown (more on roles), then click SAVE.
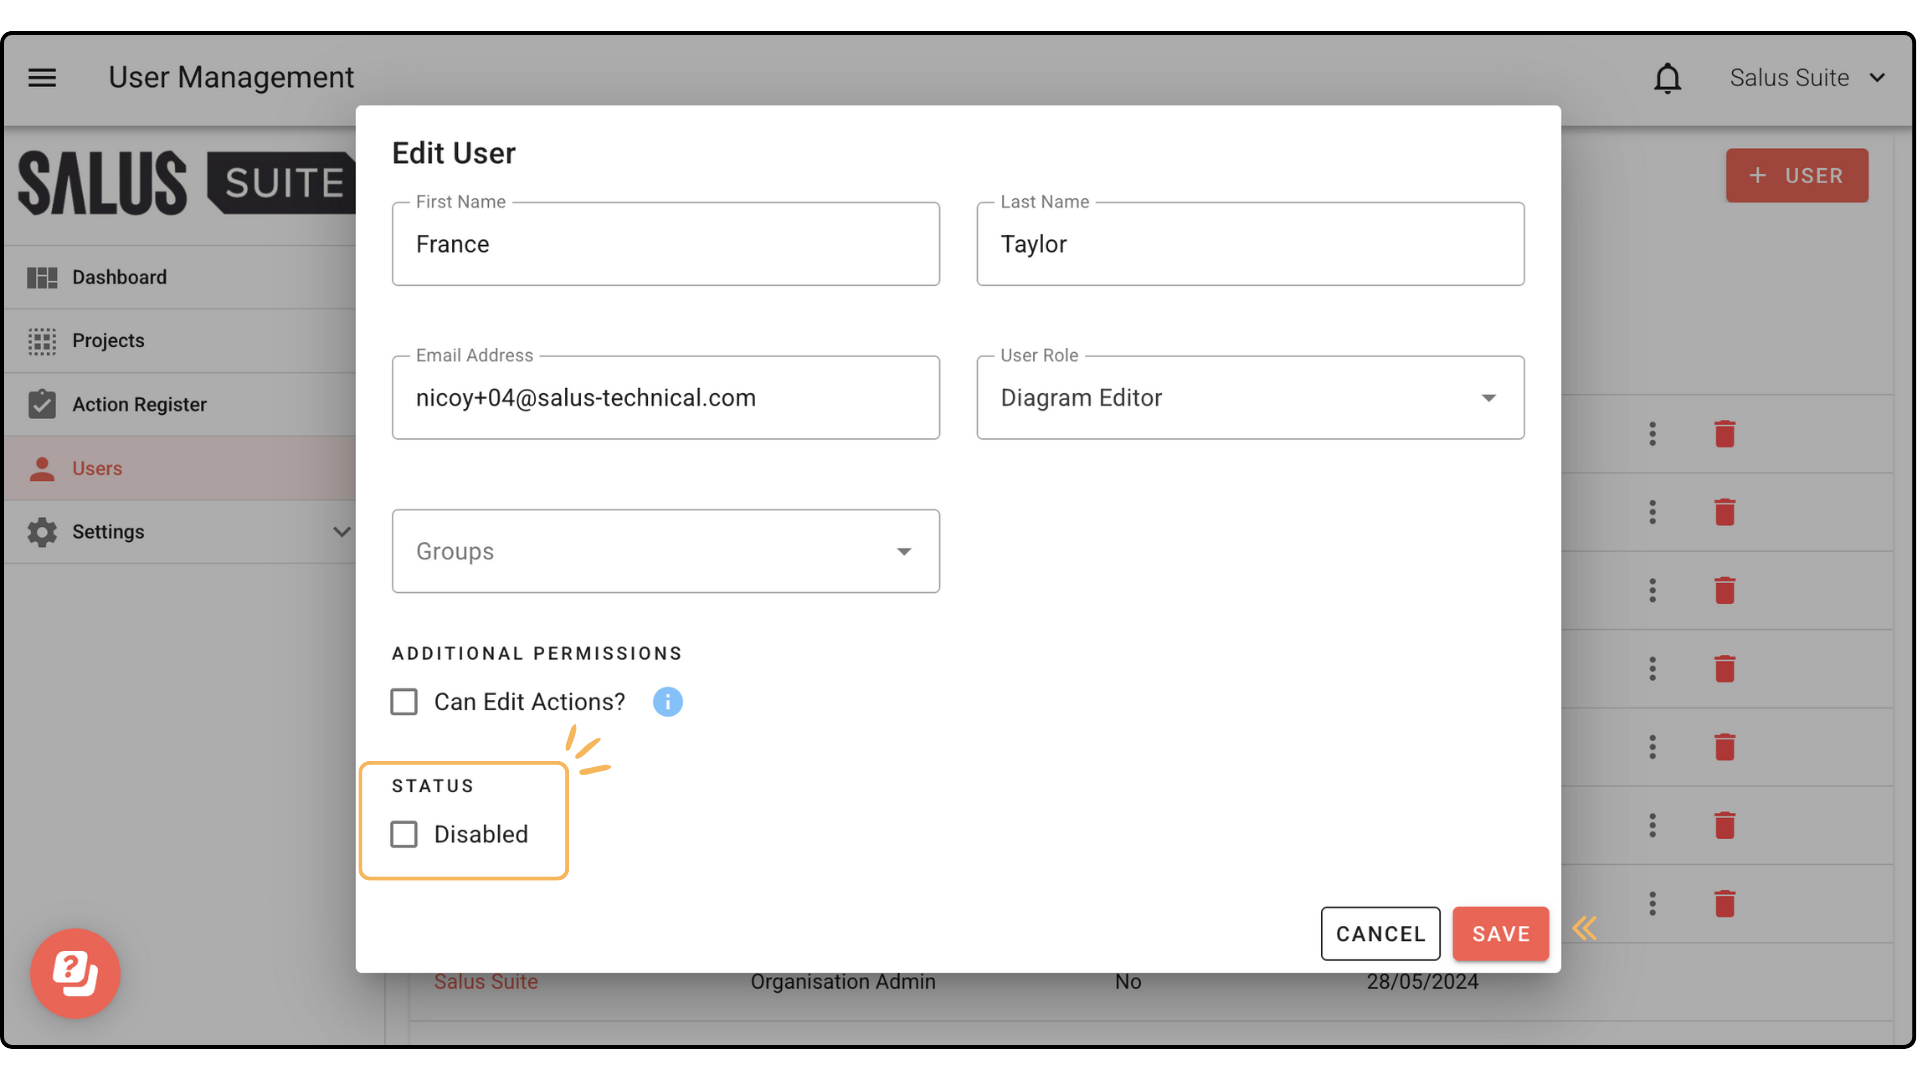
Disable or re-enable a user
We recommend disabling rather than deleting users who may need access again in future. Disabling removes access but keeps the user’s details, so you don’t have to set them up again. To restore access, untick the DISABLED box.
Step 1: In the Users menu, click the user you want to edit.
Step 2: Under Status, tick or untick DISABLED, then click SAVE.
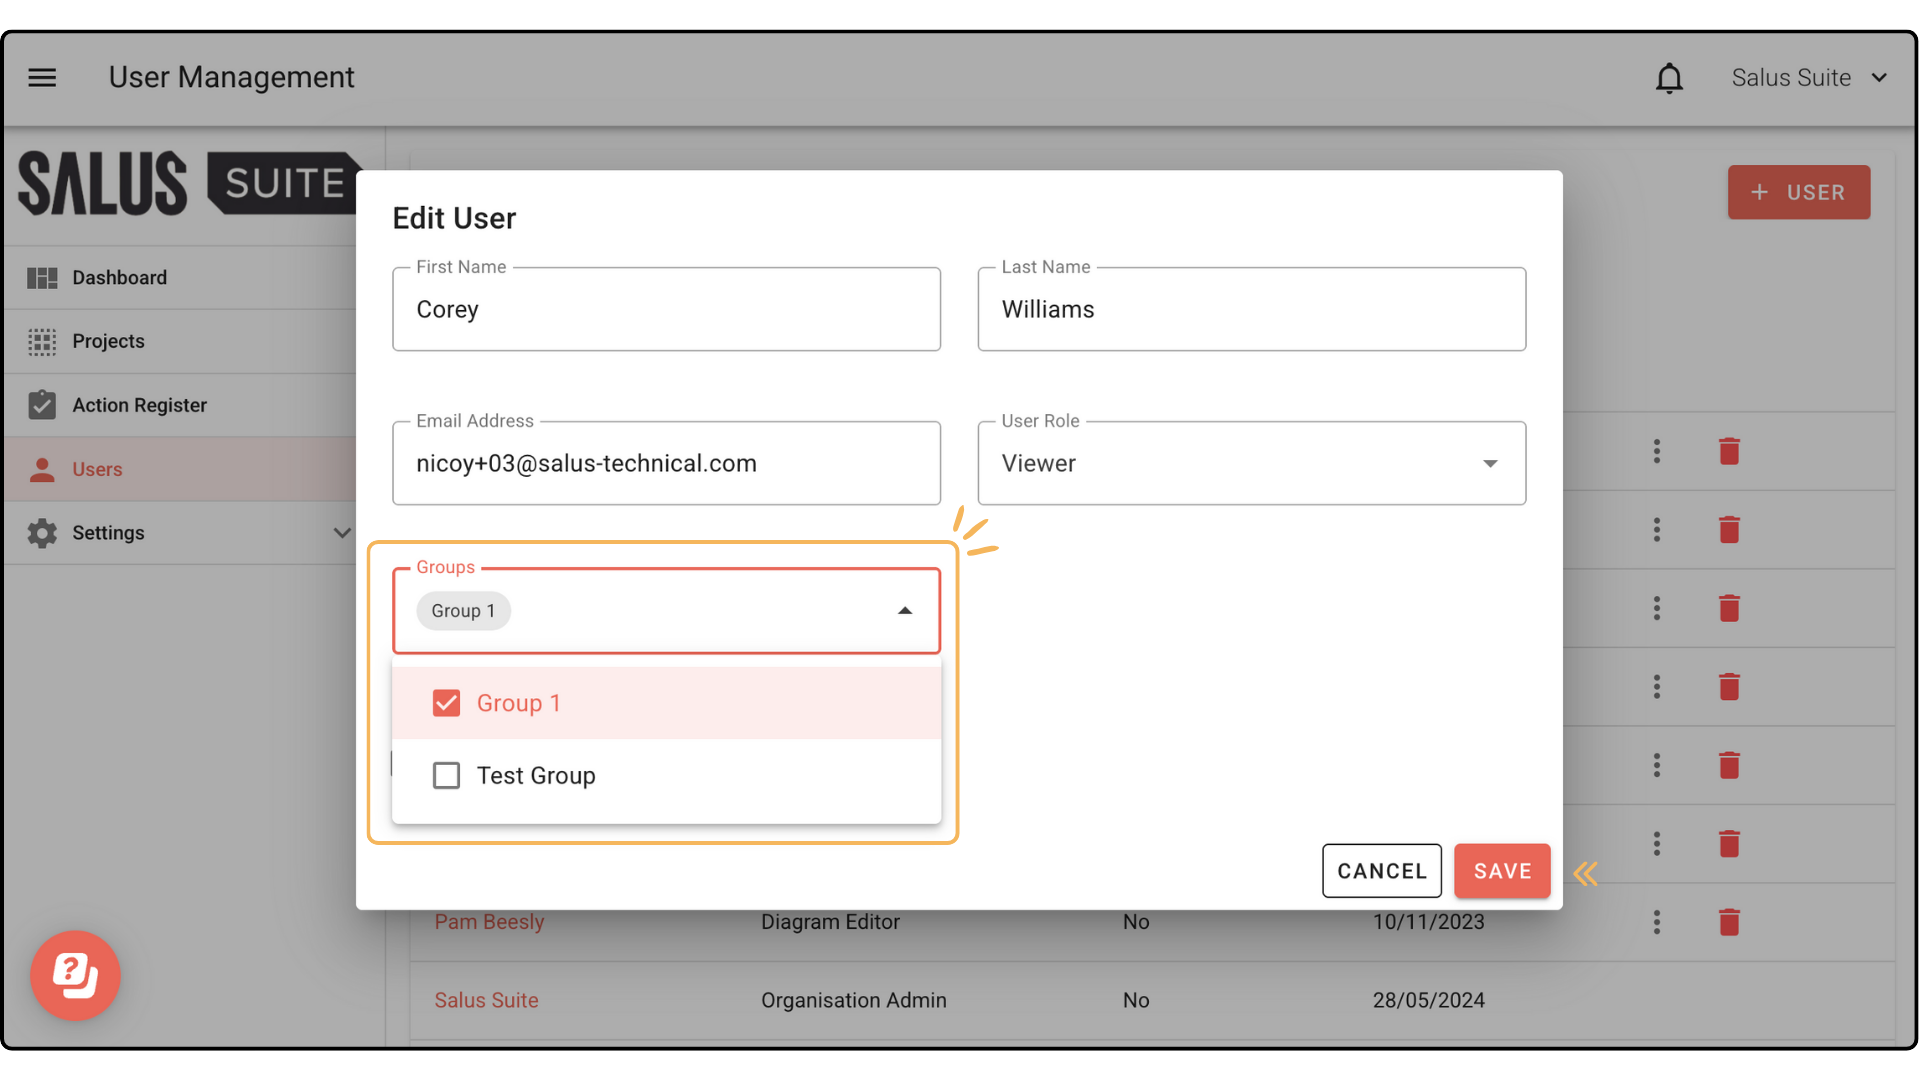
Add a user to a group
Step 1: In the Users menu, click the user you want to edit.
Step 2: In the Groups dropdown, select the groups the user should belong to, then click SAVE. The user is added to those groups and gains access to any projects assigned to them.