Import a bowtie diagram
Import an existing bowtie diagram into Bowtie Master. Before importing, populate an Excel template with the diagram’s details. To export your data for backup, see Download and export your diagram.
Step 1: In the Projects menu, create a new project or open an existing one.
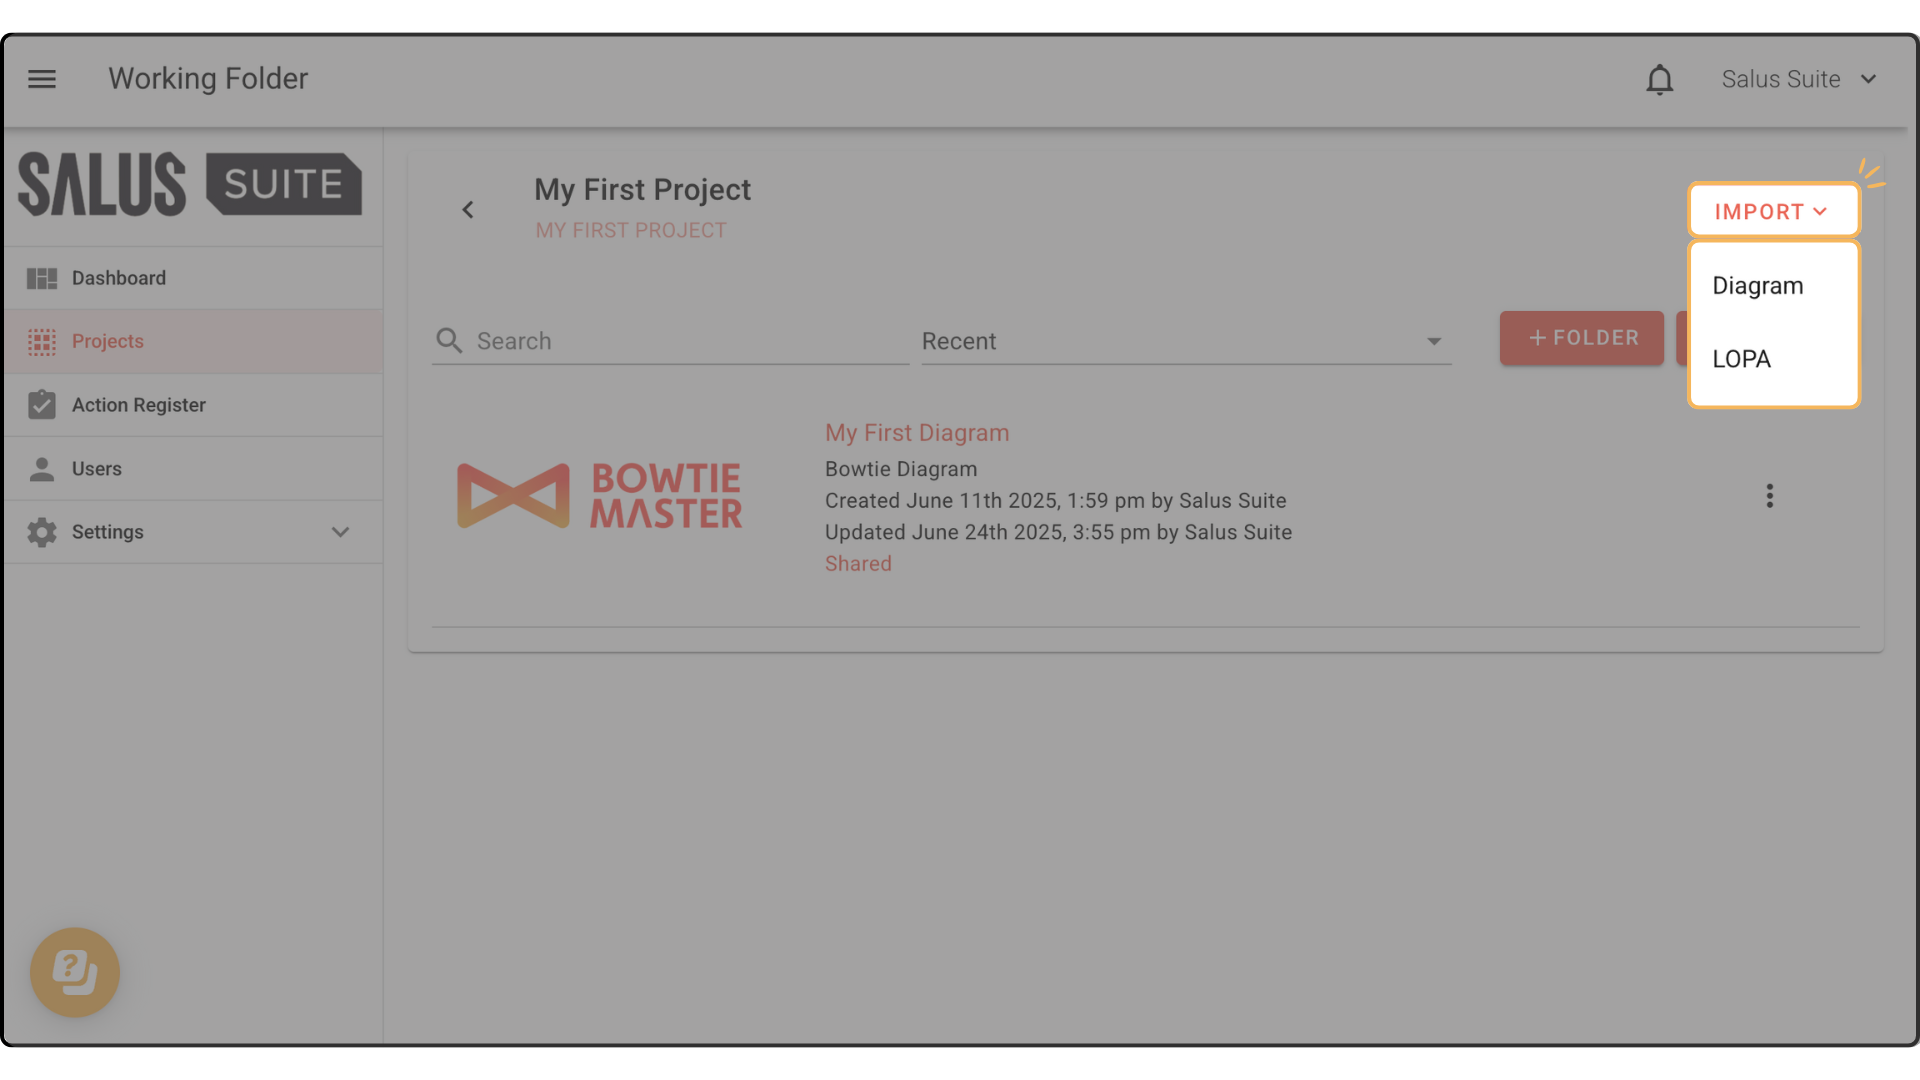
Step 2: Click IMPORT, then select Diagram from the dropdown.
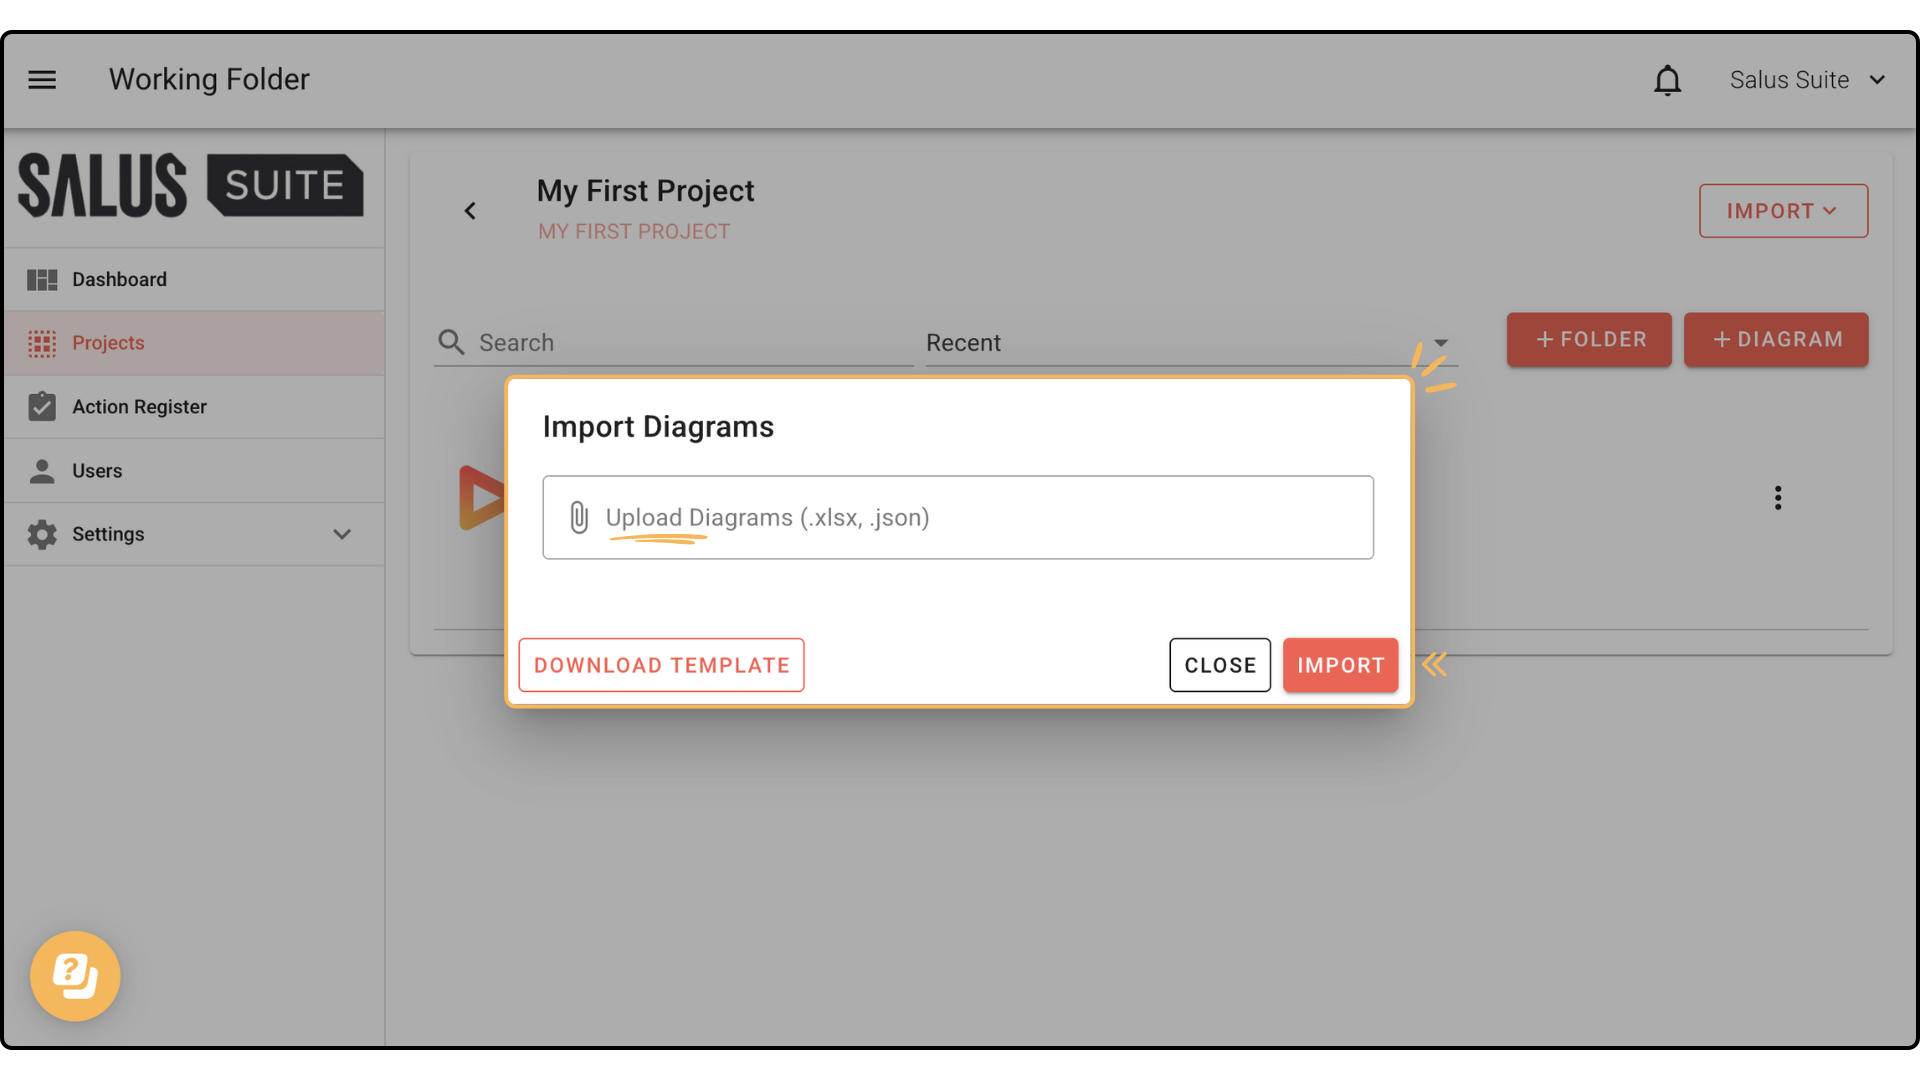
Step 3: If you don’t have a template yet, click DOWNLOAD TEMPLATE. If you already have one, skip to Step 6.

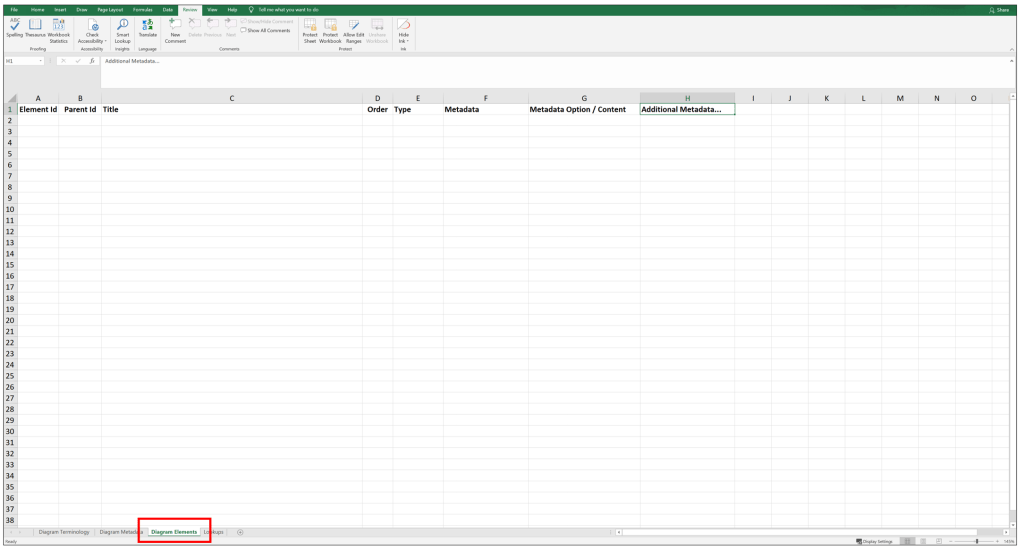
Step 4: Open the downloaded Excel workbook and go to the Diagram Elements tab. Each element has its own row, with these details:
- Element ID - a unique ID
- Parent ID - the ID of the parent element (a barrier’s parent is a threat or consequence)
- Title - the text shown on the diagram element
- Order - the order the element appears in on the diagram
- Type - the element type, for example Threat, Top Event, Barrier or Consequence
- Metadata - additional detail about the barrier (Barrier Owner, Barrier Type and so on)
- Metadata Options - if the metadata has multiple options, list them here (for example Barrier Type could be Active Hardware, Passive Hardware or Active Hardware + Human)
The figure below shows example completed rows in the Diagram Elements tab.
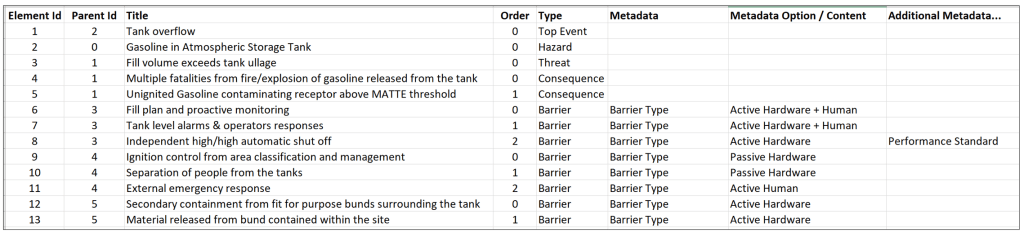
Once the tab is complete, save the workbook. Keep all worksheet names the same as the original downloaded workbook.
Step 5: Repeat Steps 1 and 2 above.
Step 6: Upload the Excel workbook, then click IMPORT.
The new bowtie diagram appears in the project folder.