Branching incident diagrams
Branch your incident investigation diagram to make a timeline of events more accurate.
Step 1: In the Projects menu, open your diagram.
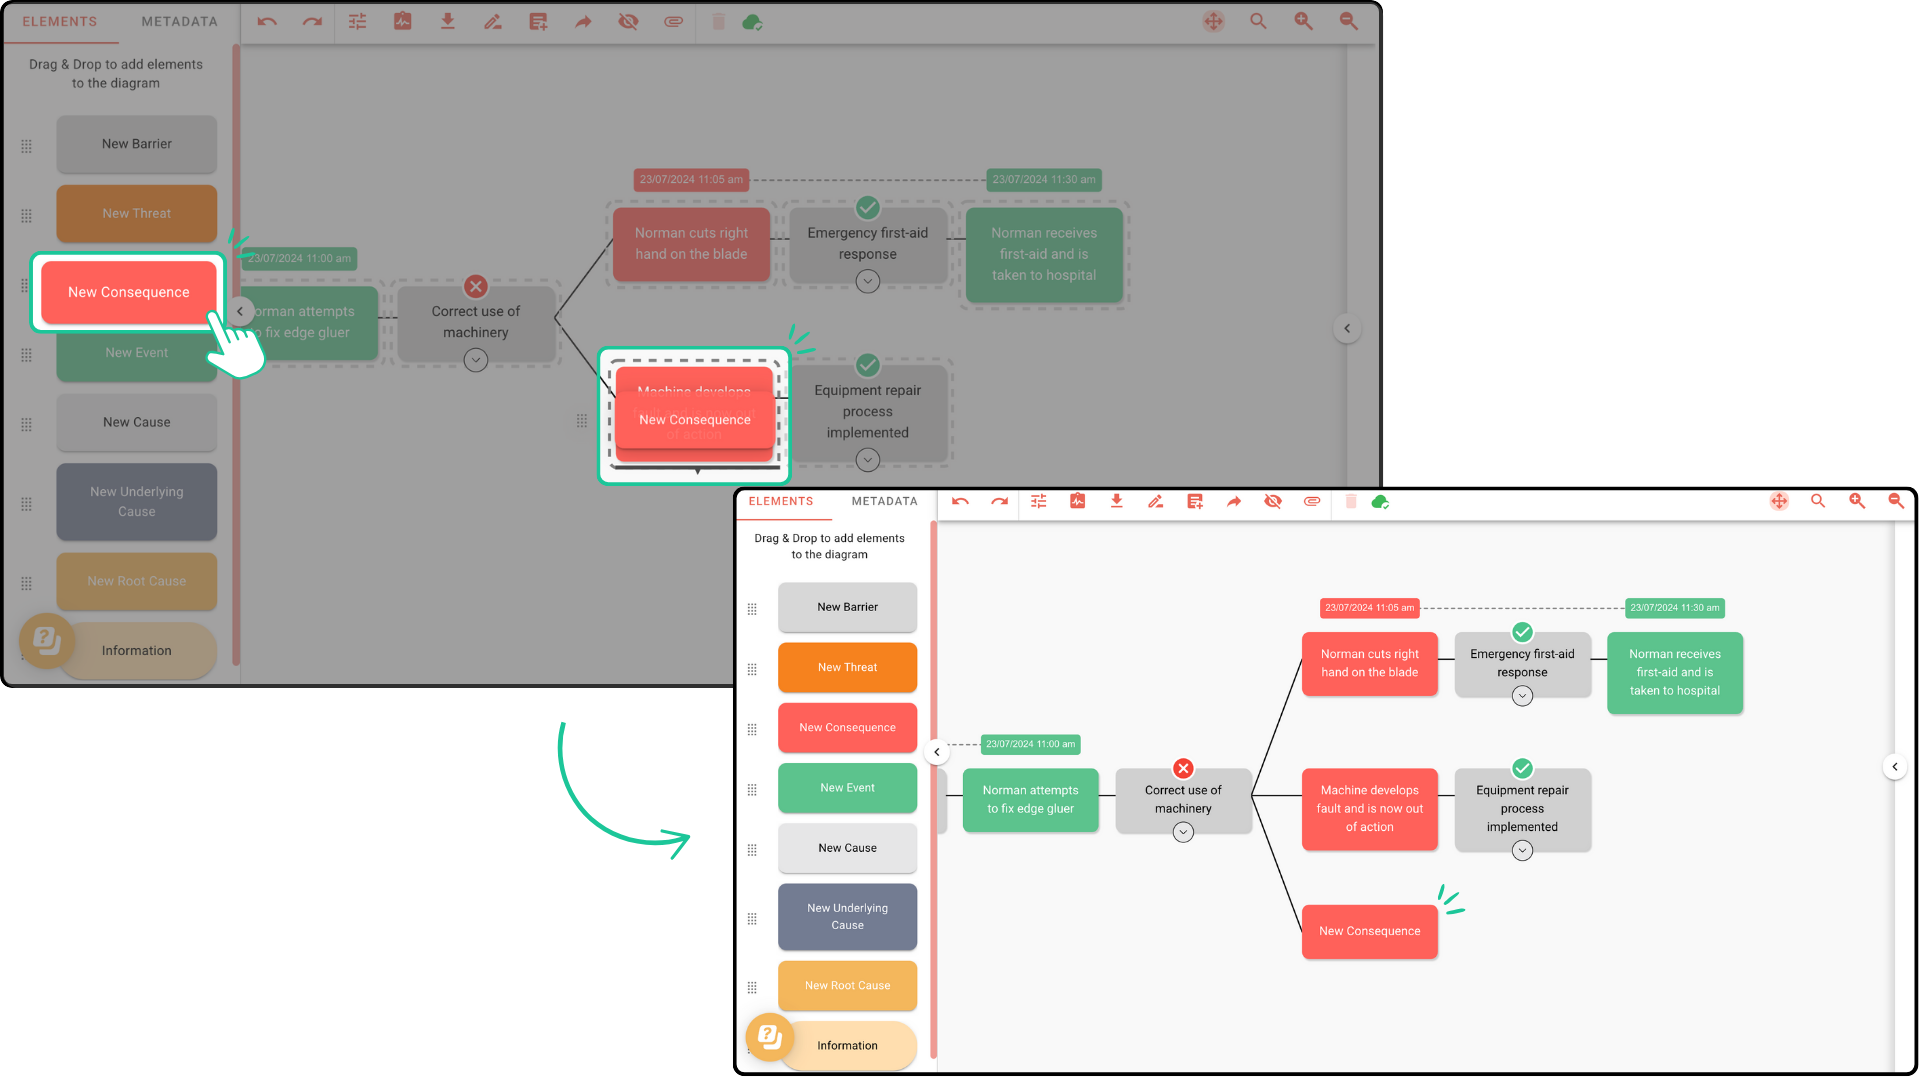
Step 2: Drag an element into the diagram and hover it above or below an existing element. A bold black indicator shows where the element will branch off. Drop it to create a new branch, then keep adding elements to build out the investigation.
You can only branch through Barrier, Threat, Consequence and Event elements.
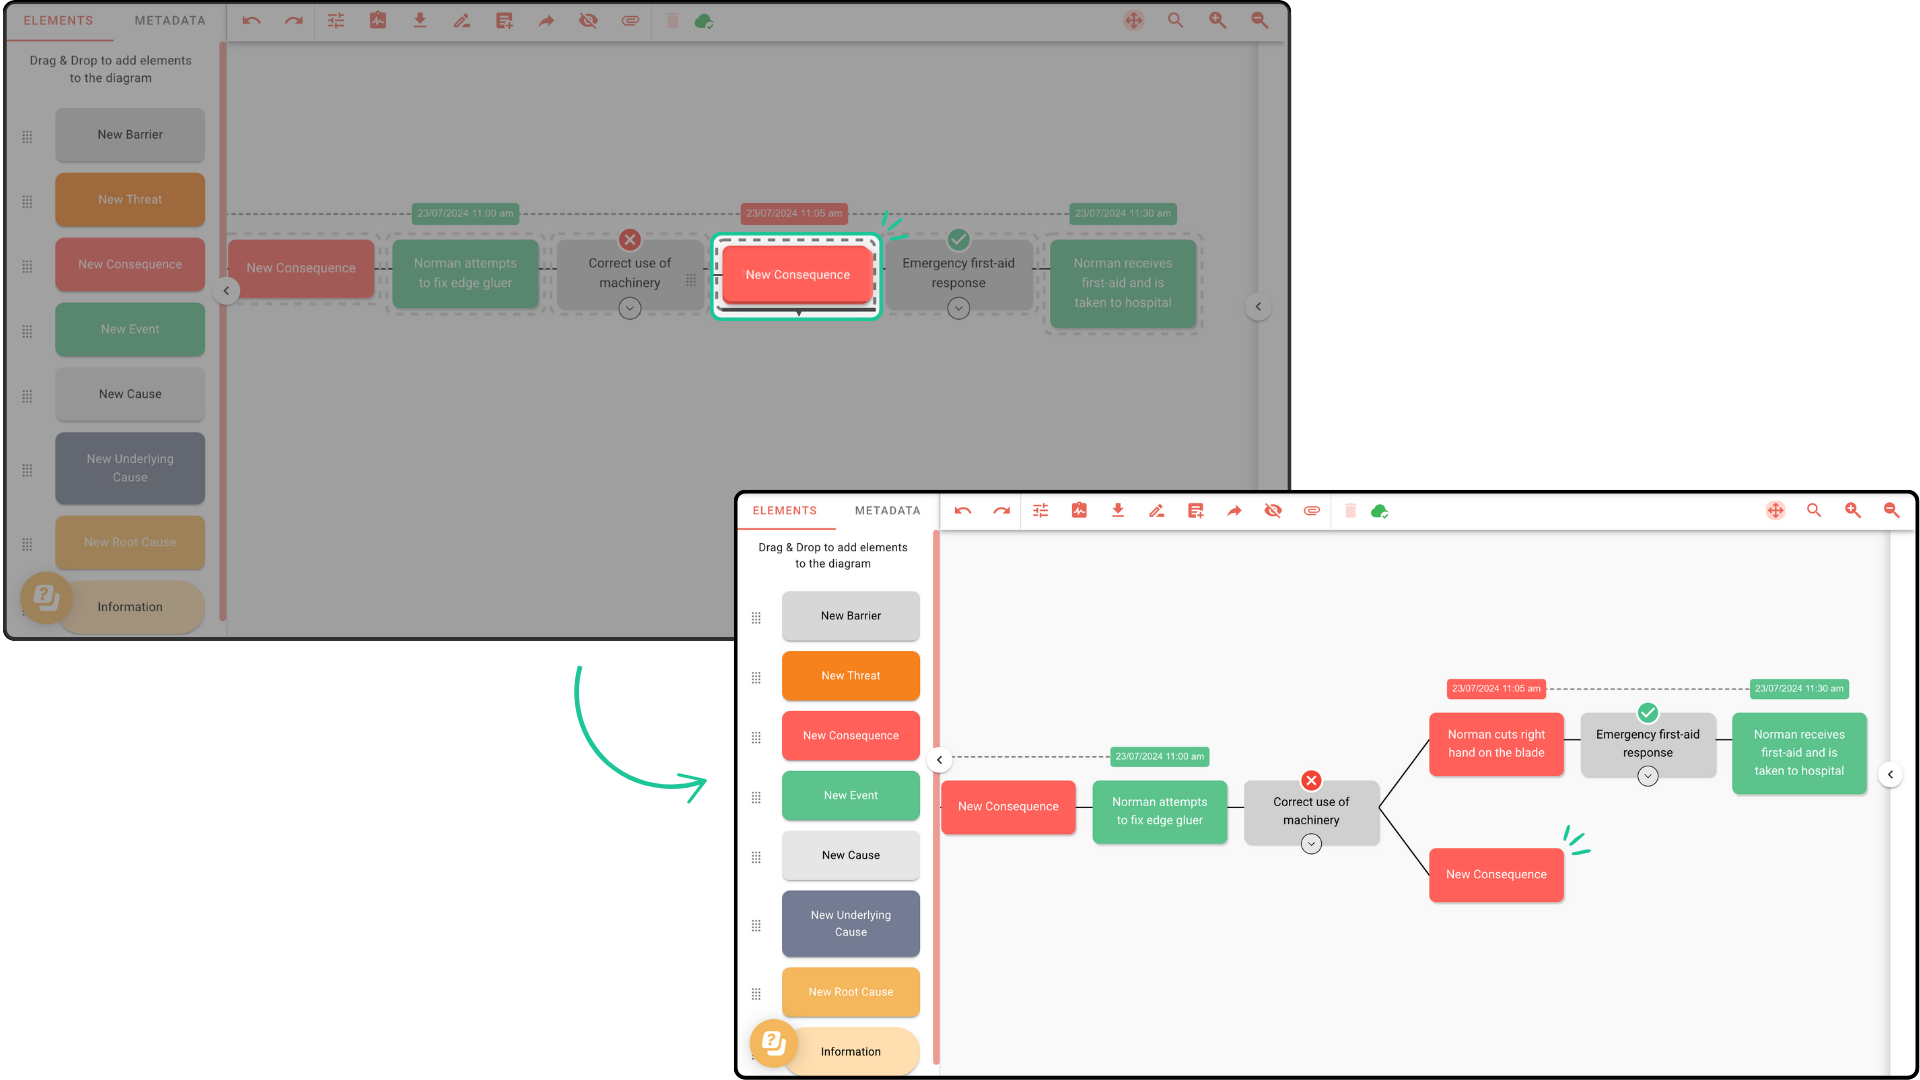
From the new branch, continue the timeline by adding elements and uncovering the root cause.
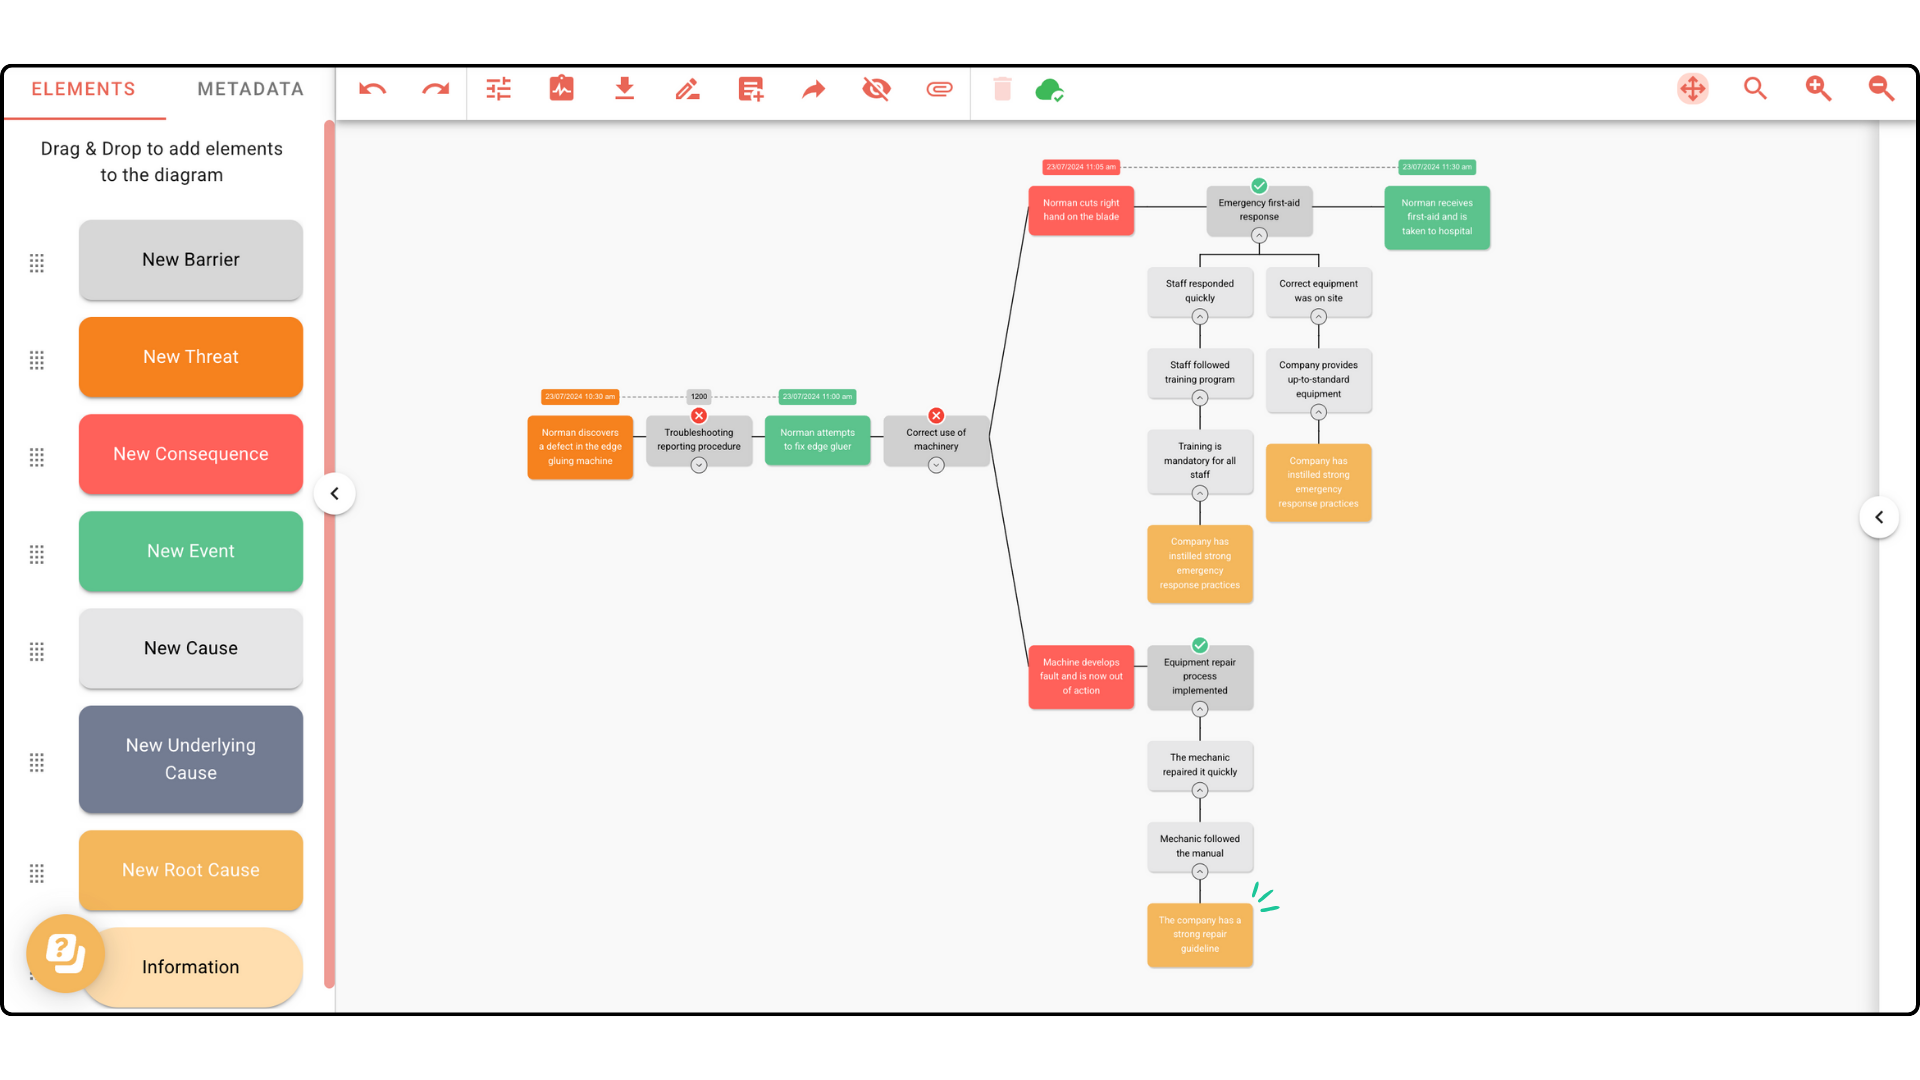
There’s no limit to how many branches you can add. Not all incidents are linear - some have multiple factors that an in-depth investigation needs to account for. Below is an example of a multi-branch diagram.