Build your first diagram
In this tutorial, we’ll show you how to create a diagram, add, edit, delete and clone elements and add attachments.
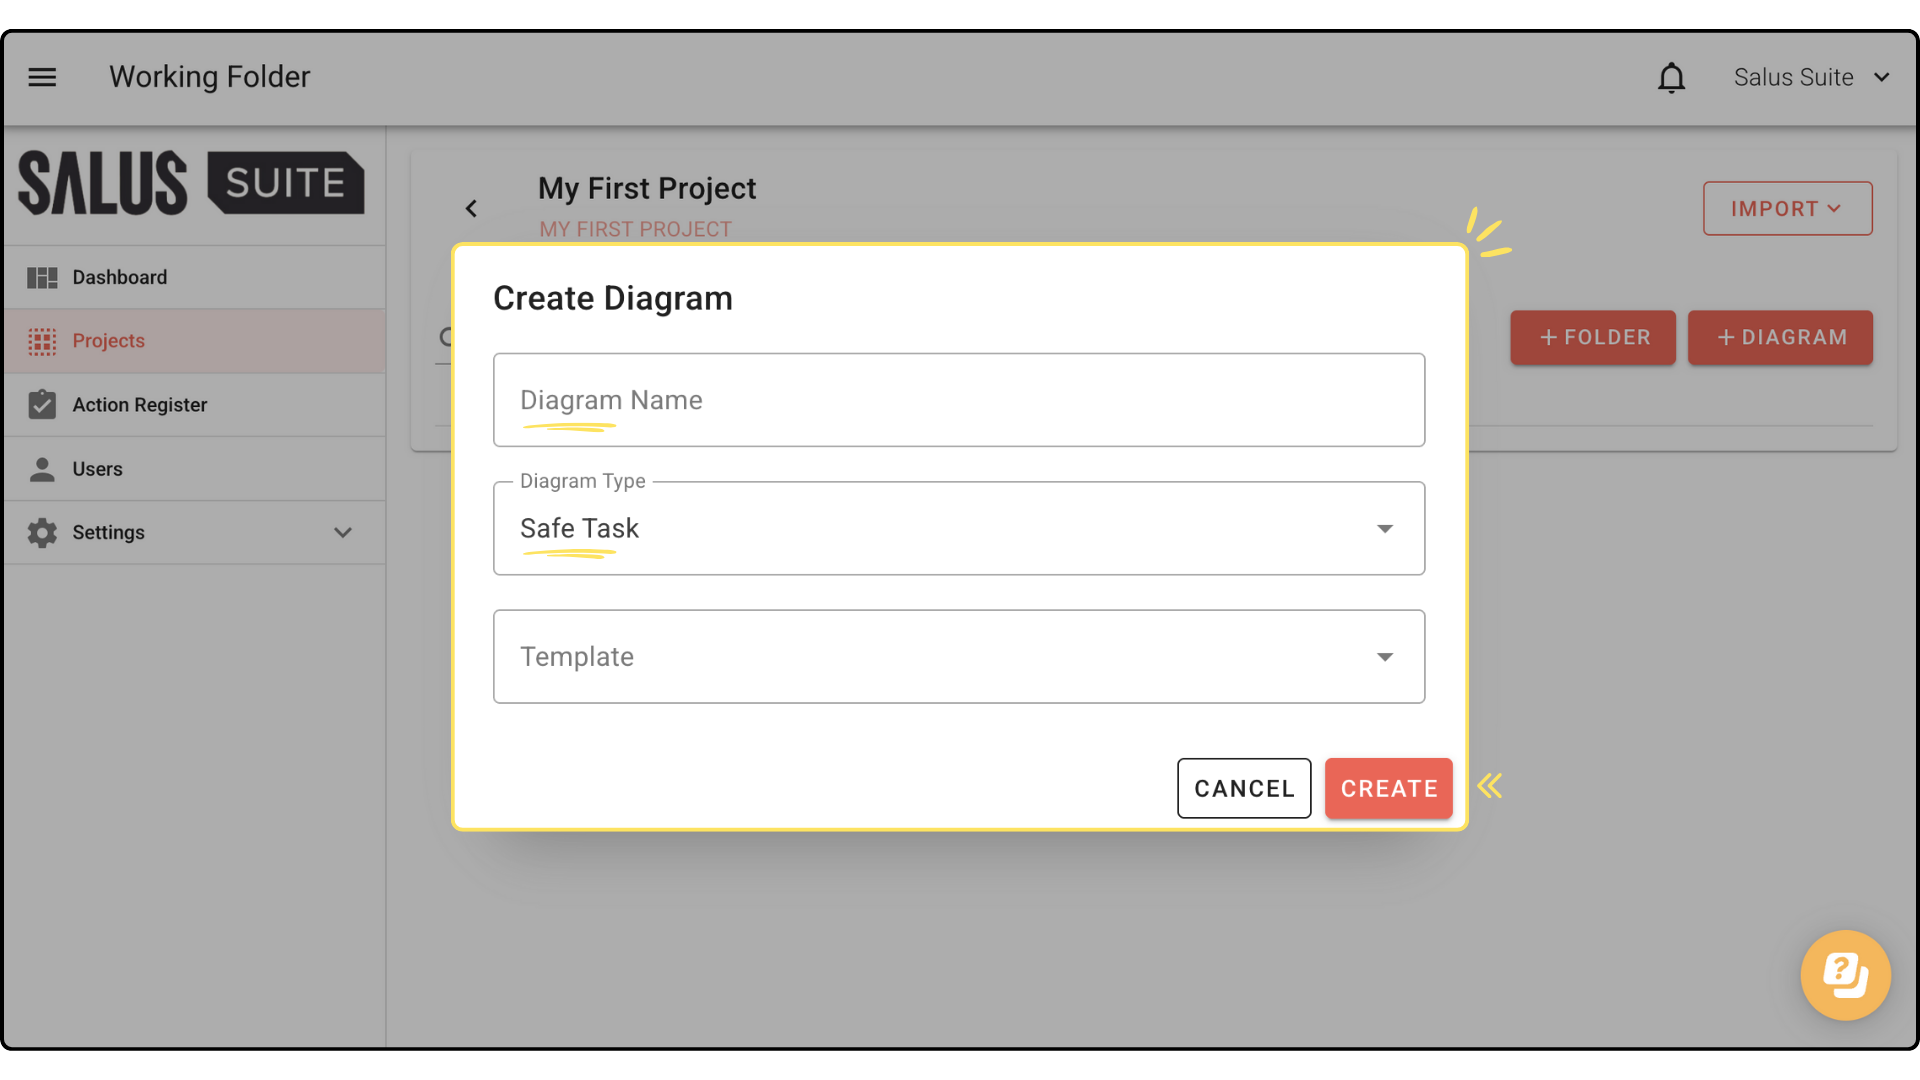
In the new project, click + NEW DIAGRAM. Enter a Diagram Name, select Safe Task in Diagram Type and choose a template if you have one. Click CREATE.
Add a task
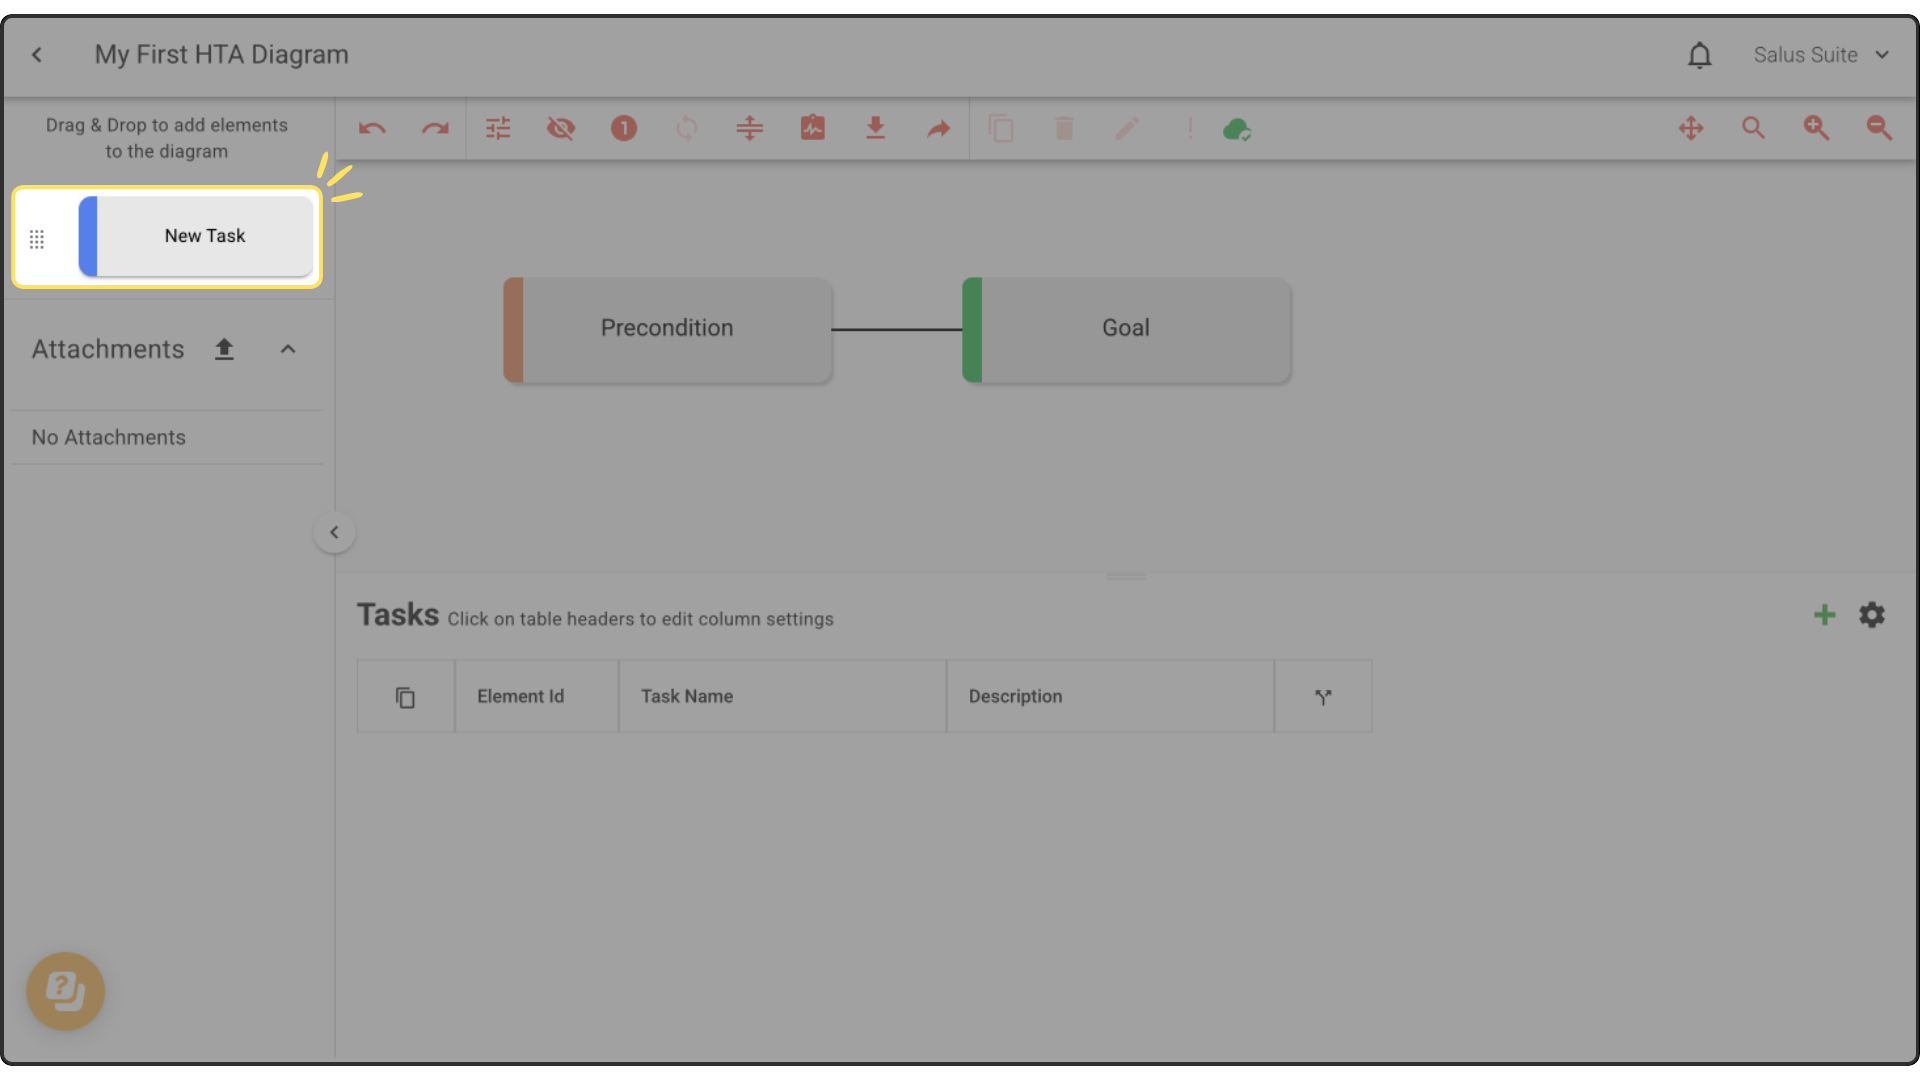
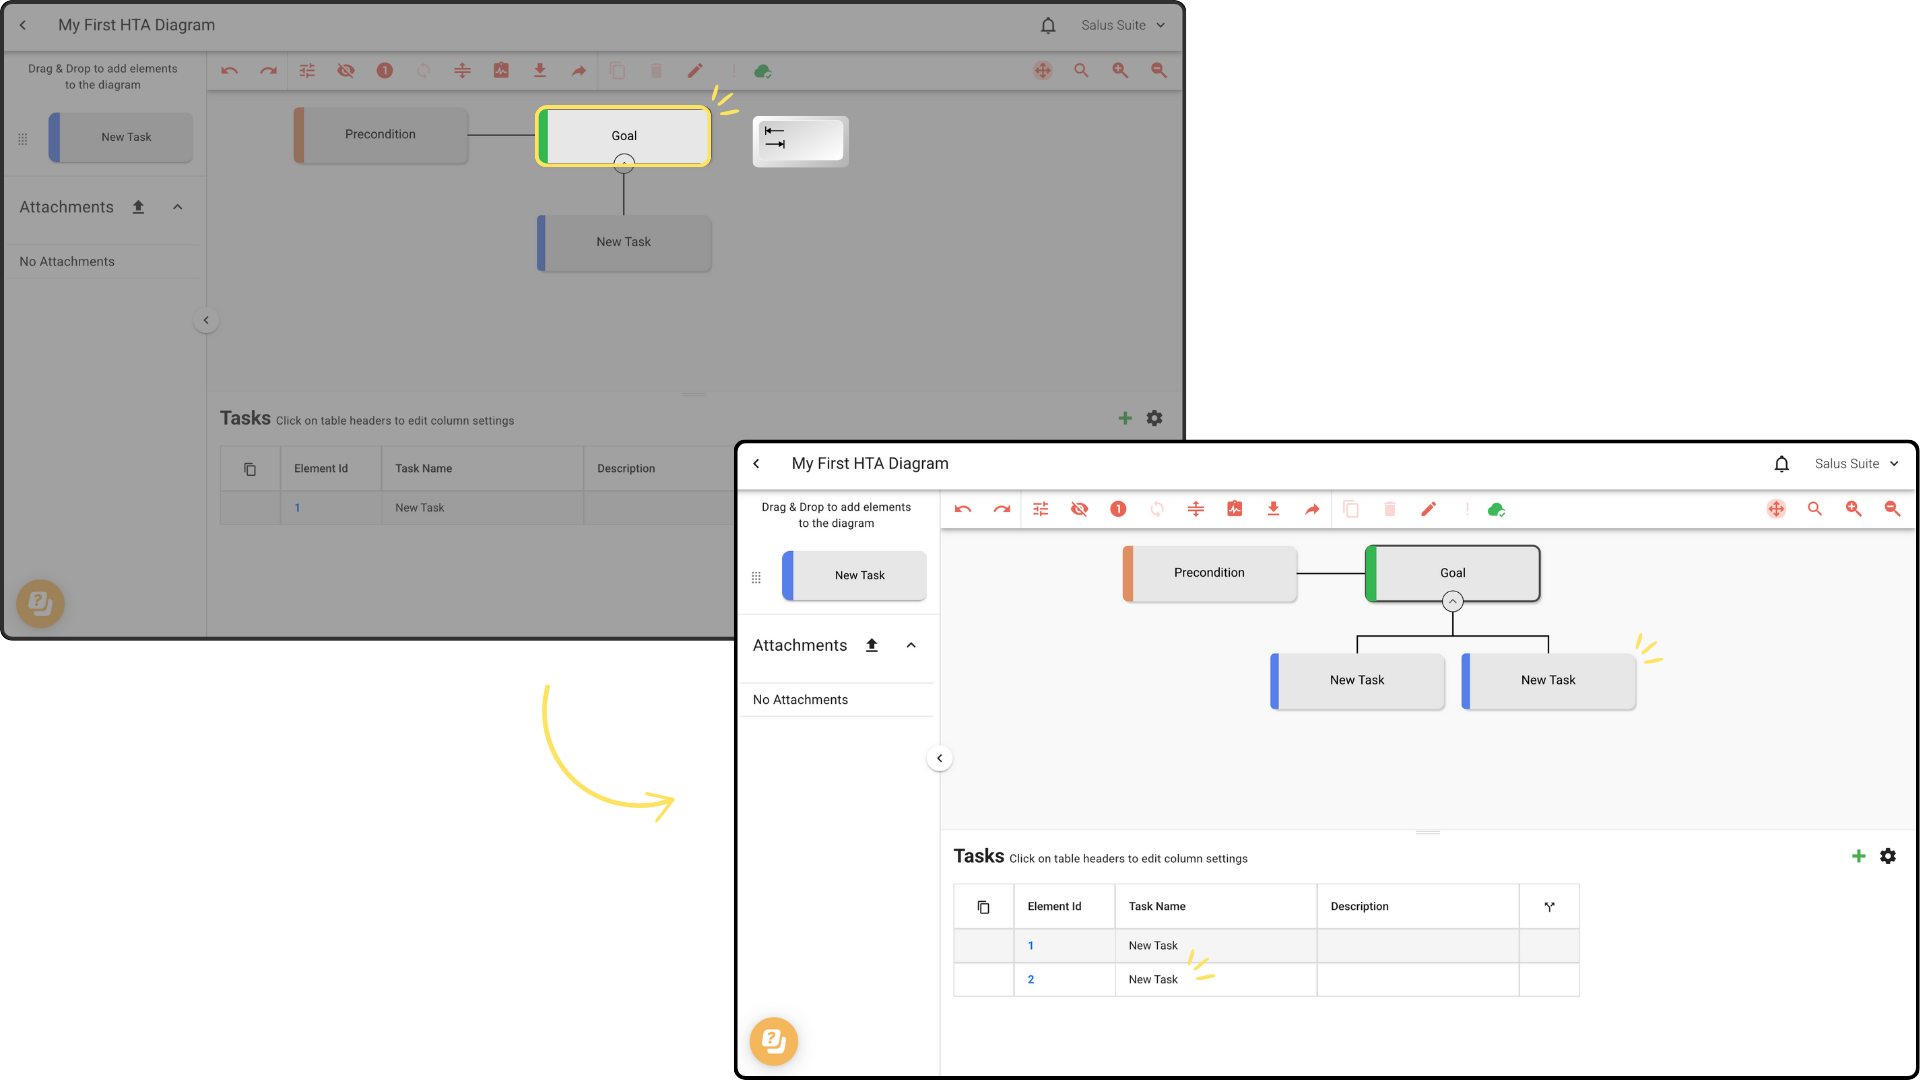
Step 1: Drag elements from the left of the Diagram Editor into the diagram. Start by placing a New Task below the Goal.
A quicker way to add a task is the Tab key. Select the Goal or a Task and press Tab to add a child. You can also do this in the table - click a Task and press Tab.
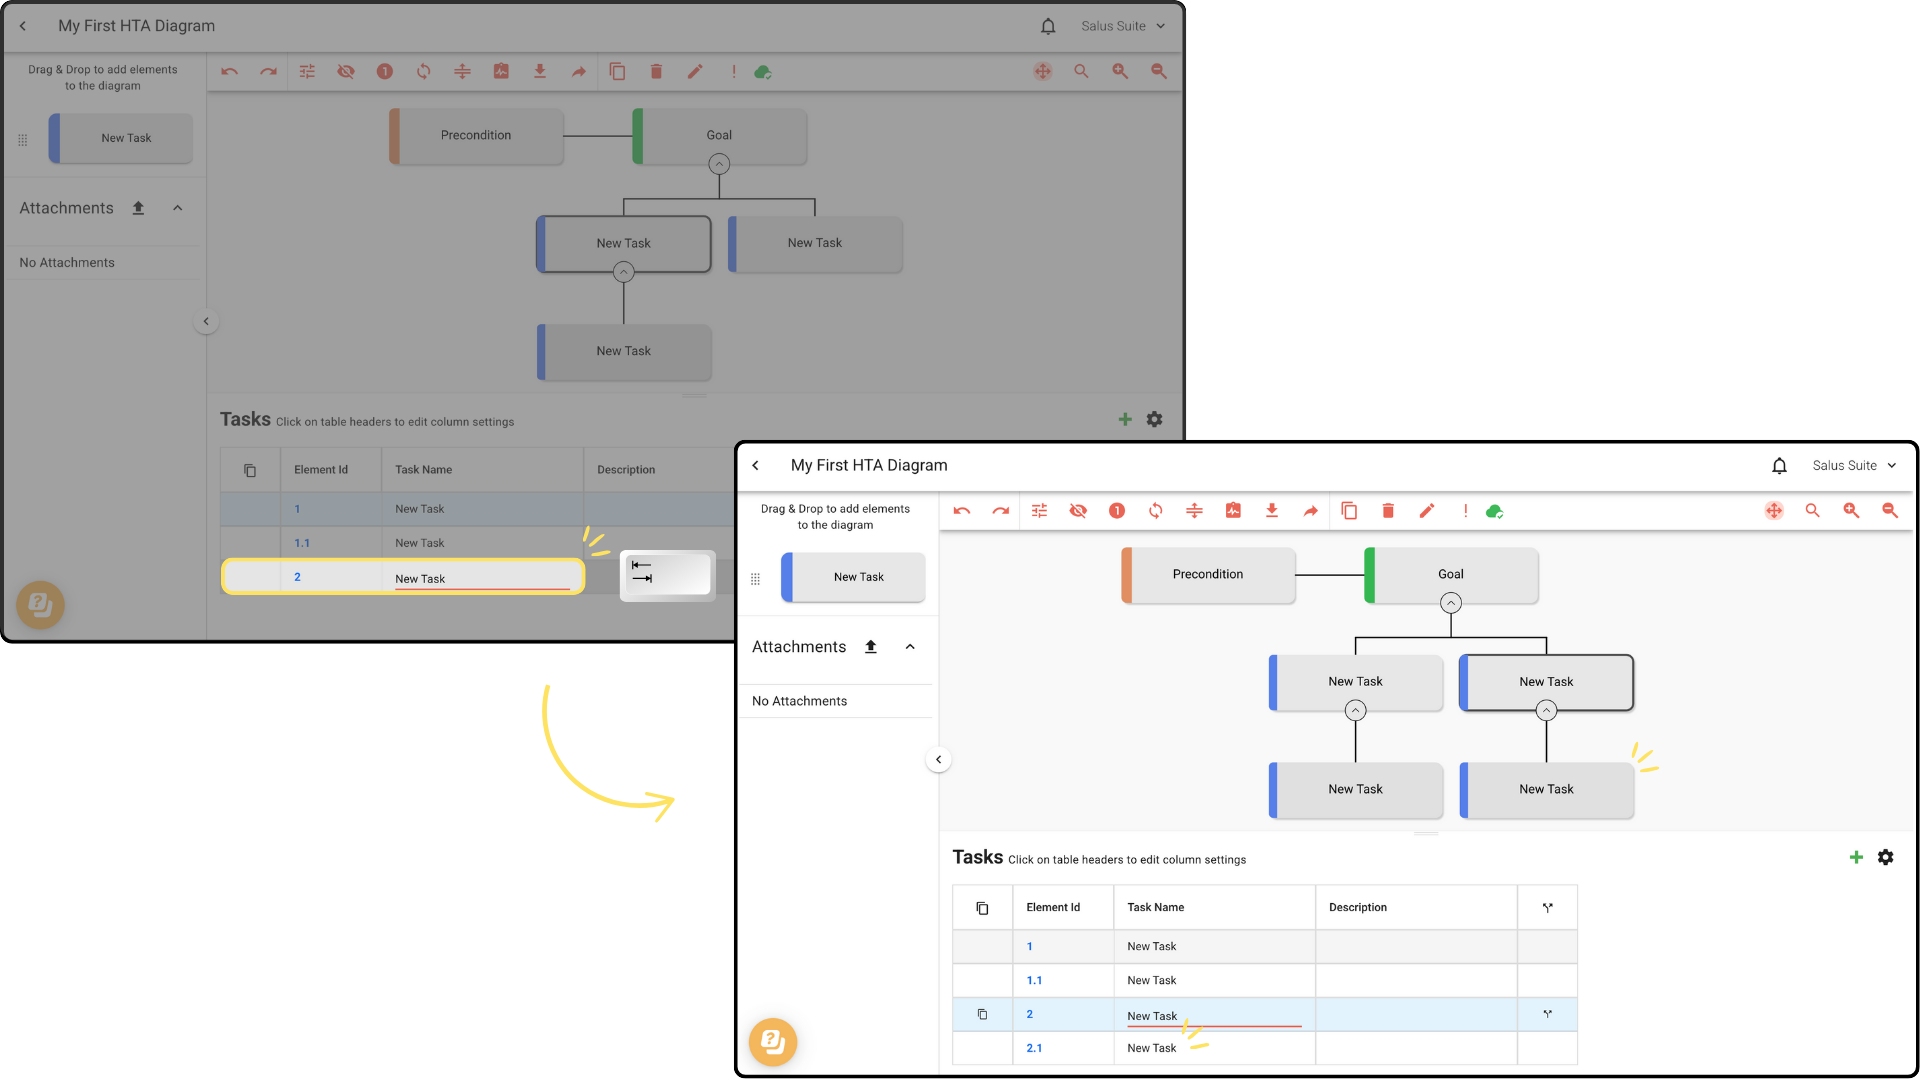
Step 2: To edit an element, double-click it and rename it.

Delete an element
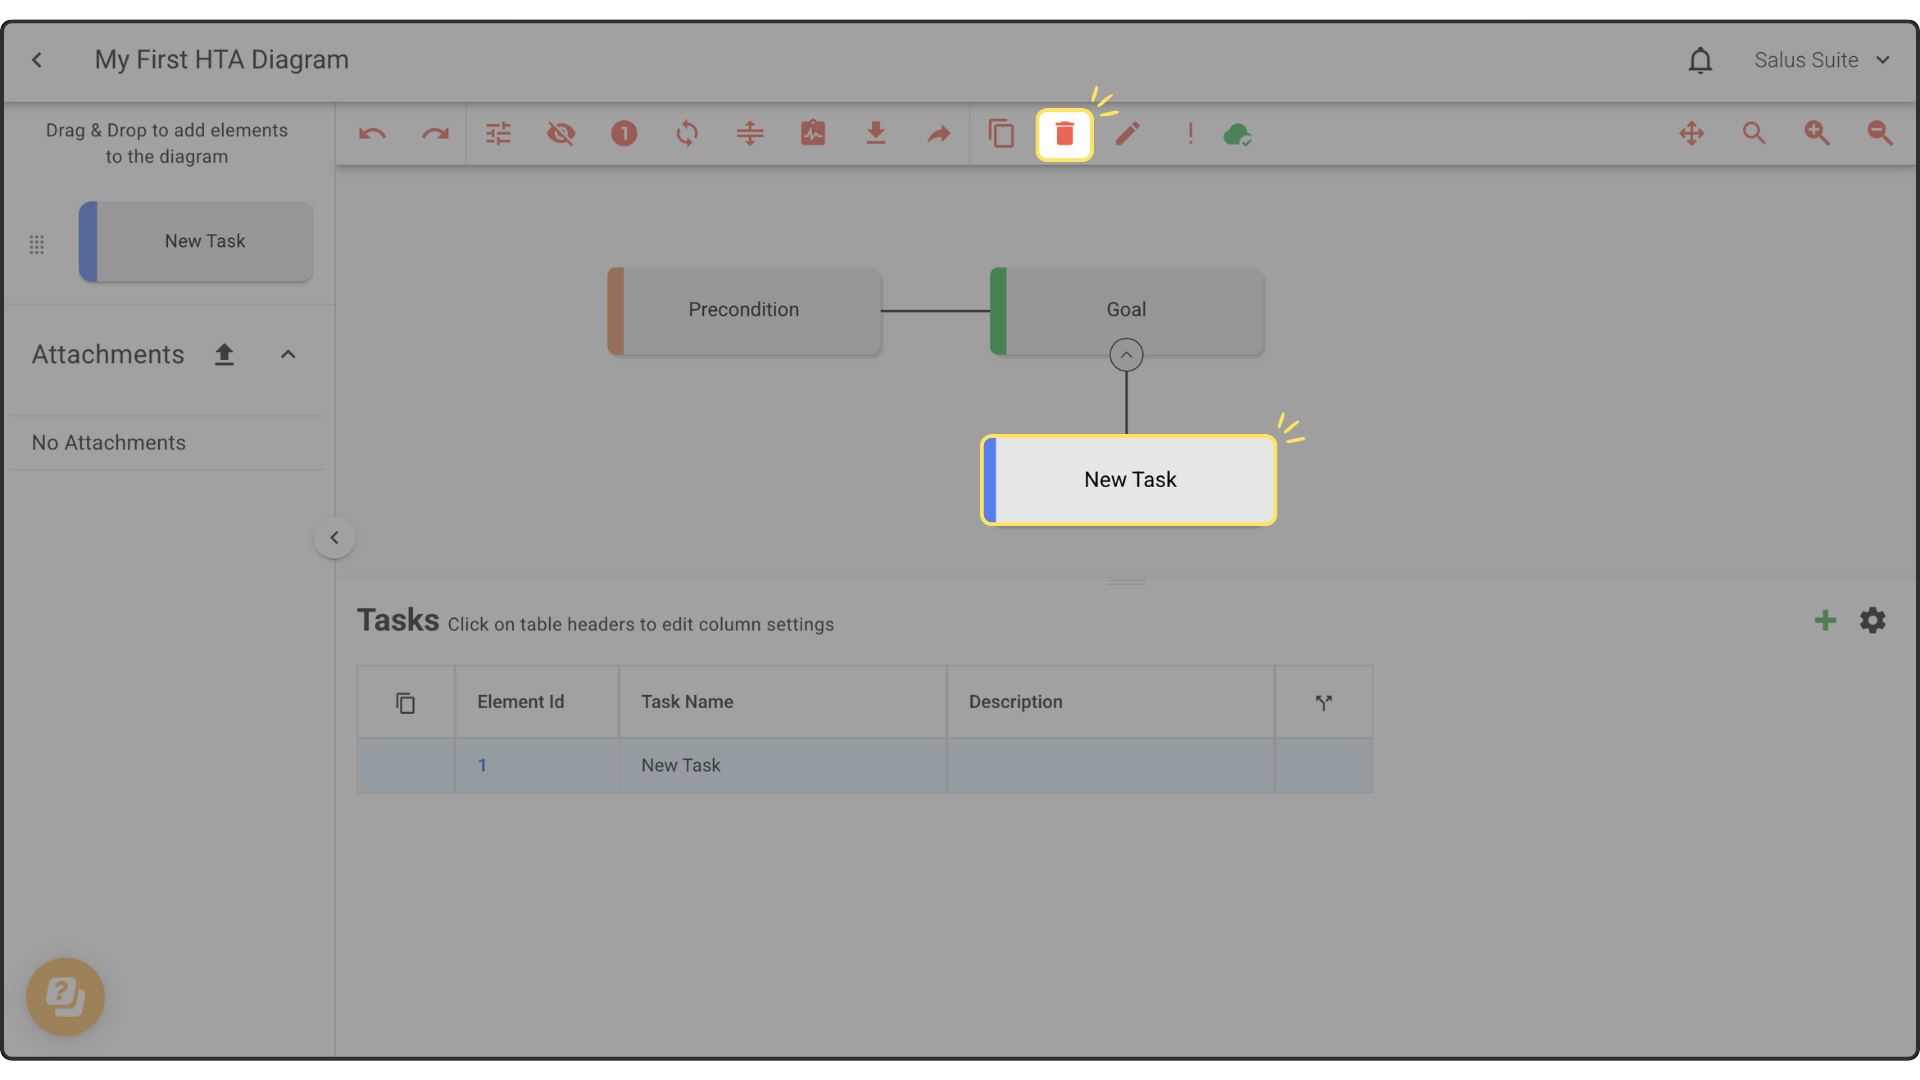
Step 1: Double-click the element you want to delete, then click DELETE ELEMENT in the toolbar.
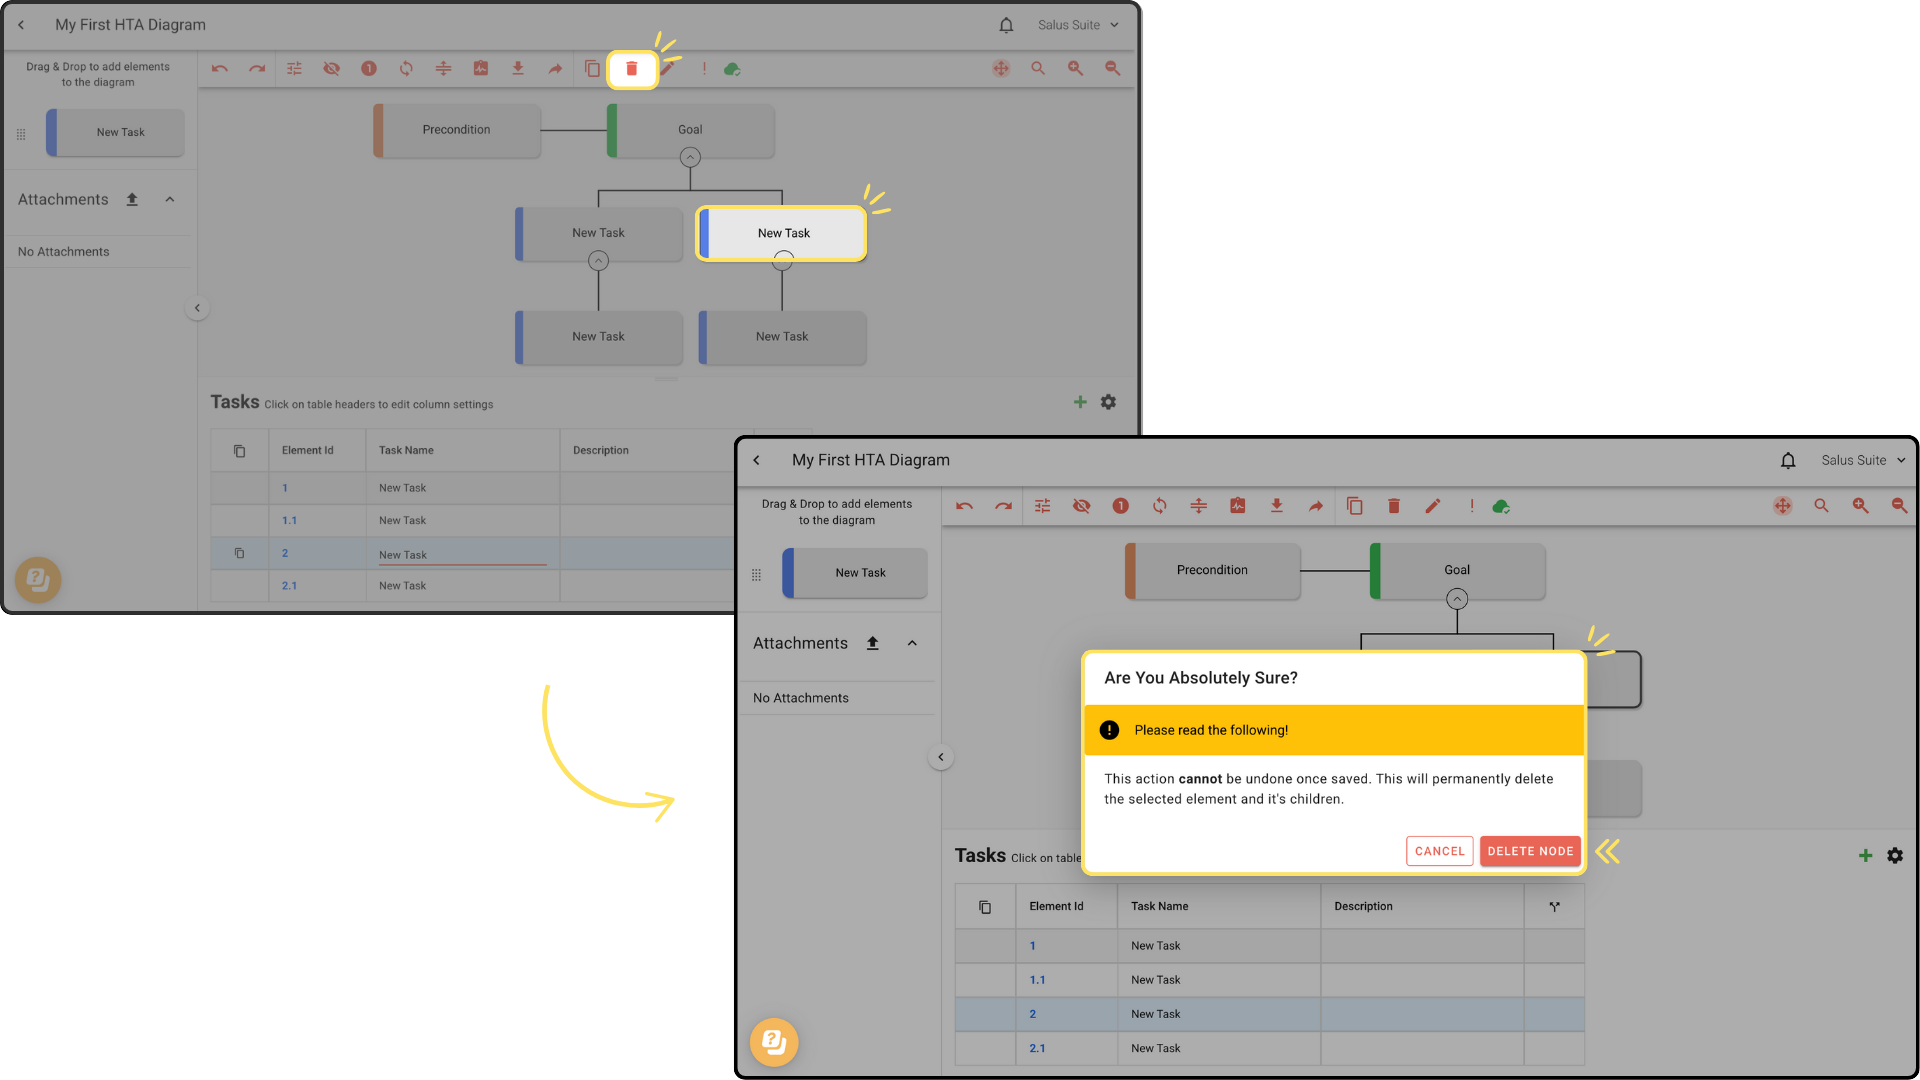
Step 2: To delete an entire node, double-click any element in the node, then click DELETE ELEMENT. This permanently deletes the selected element and its children, and cannot be undone once saved.
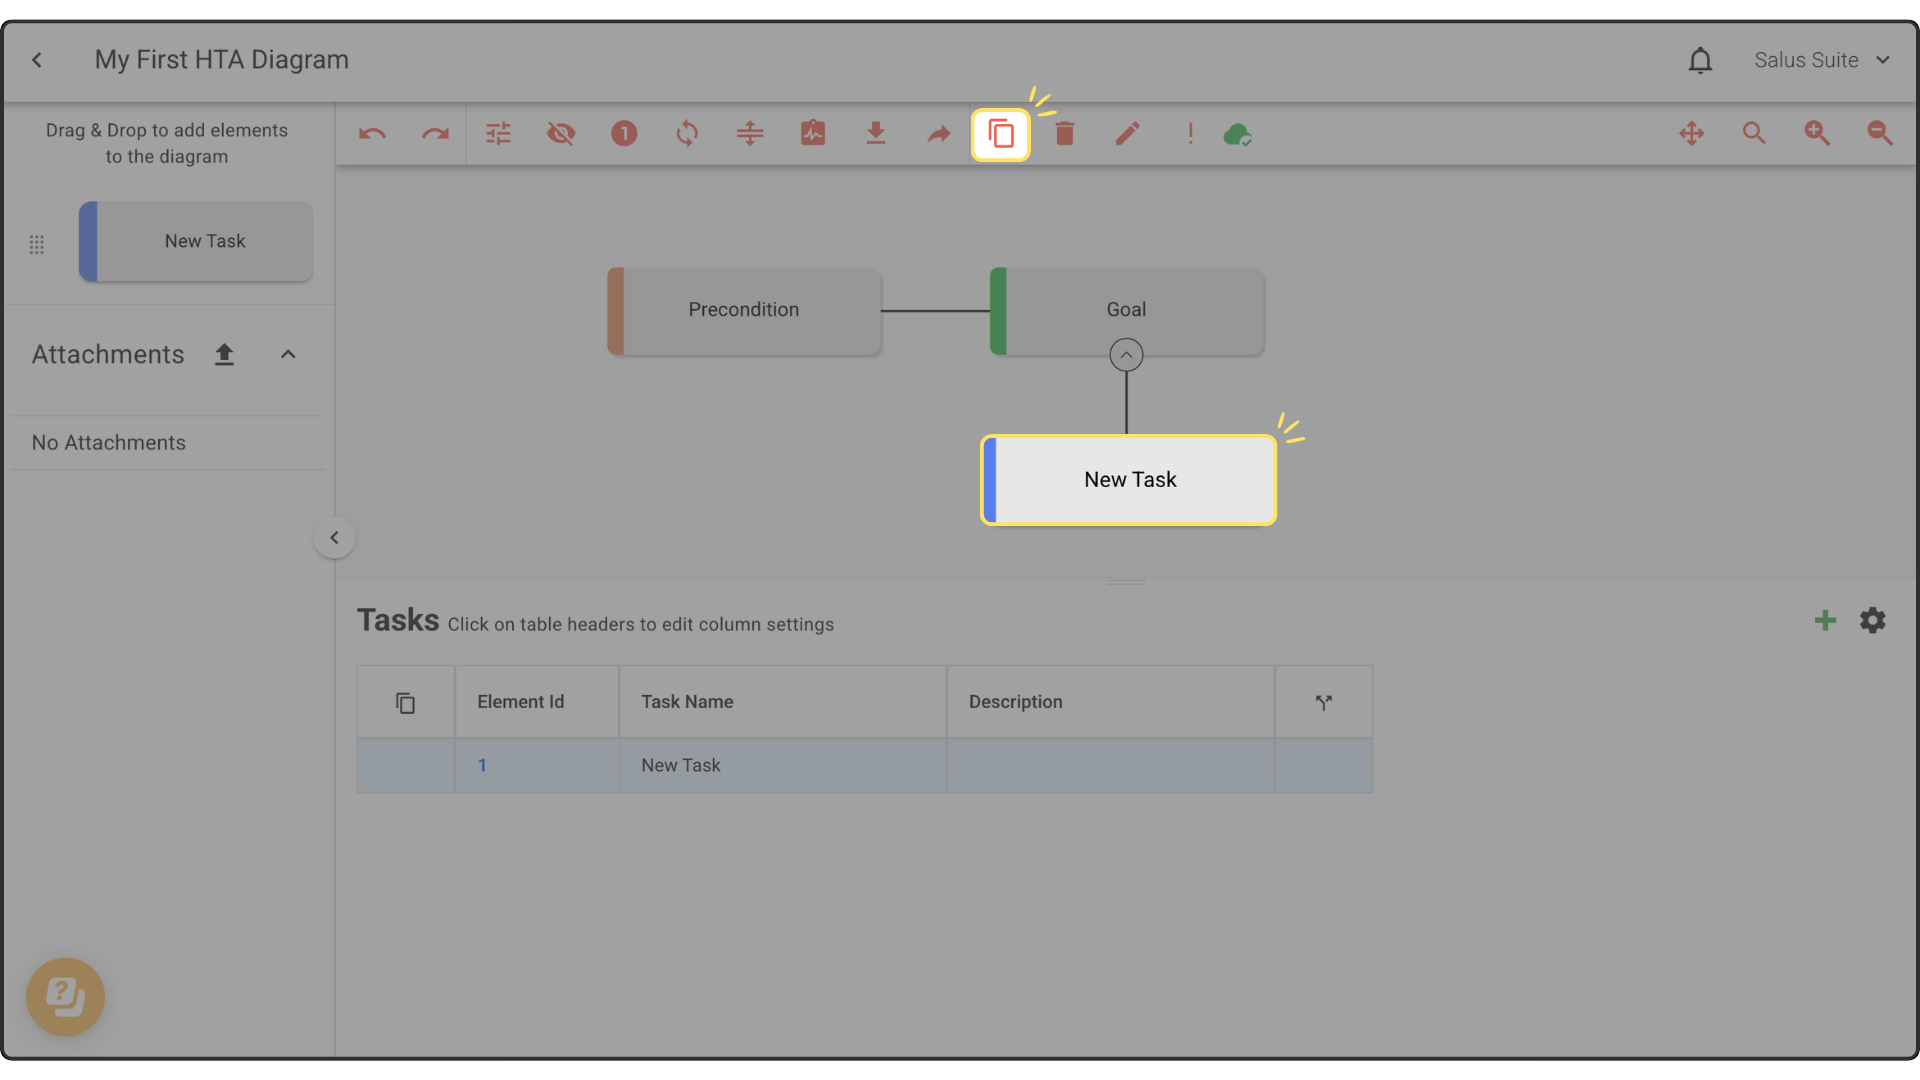
Clone an element
Step 1: Double-click the element you want to clone, then click CLONE ELEMENT in the toolbar.
Add an attachment
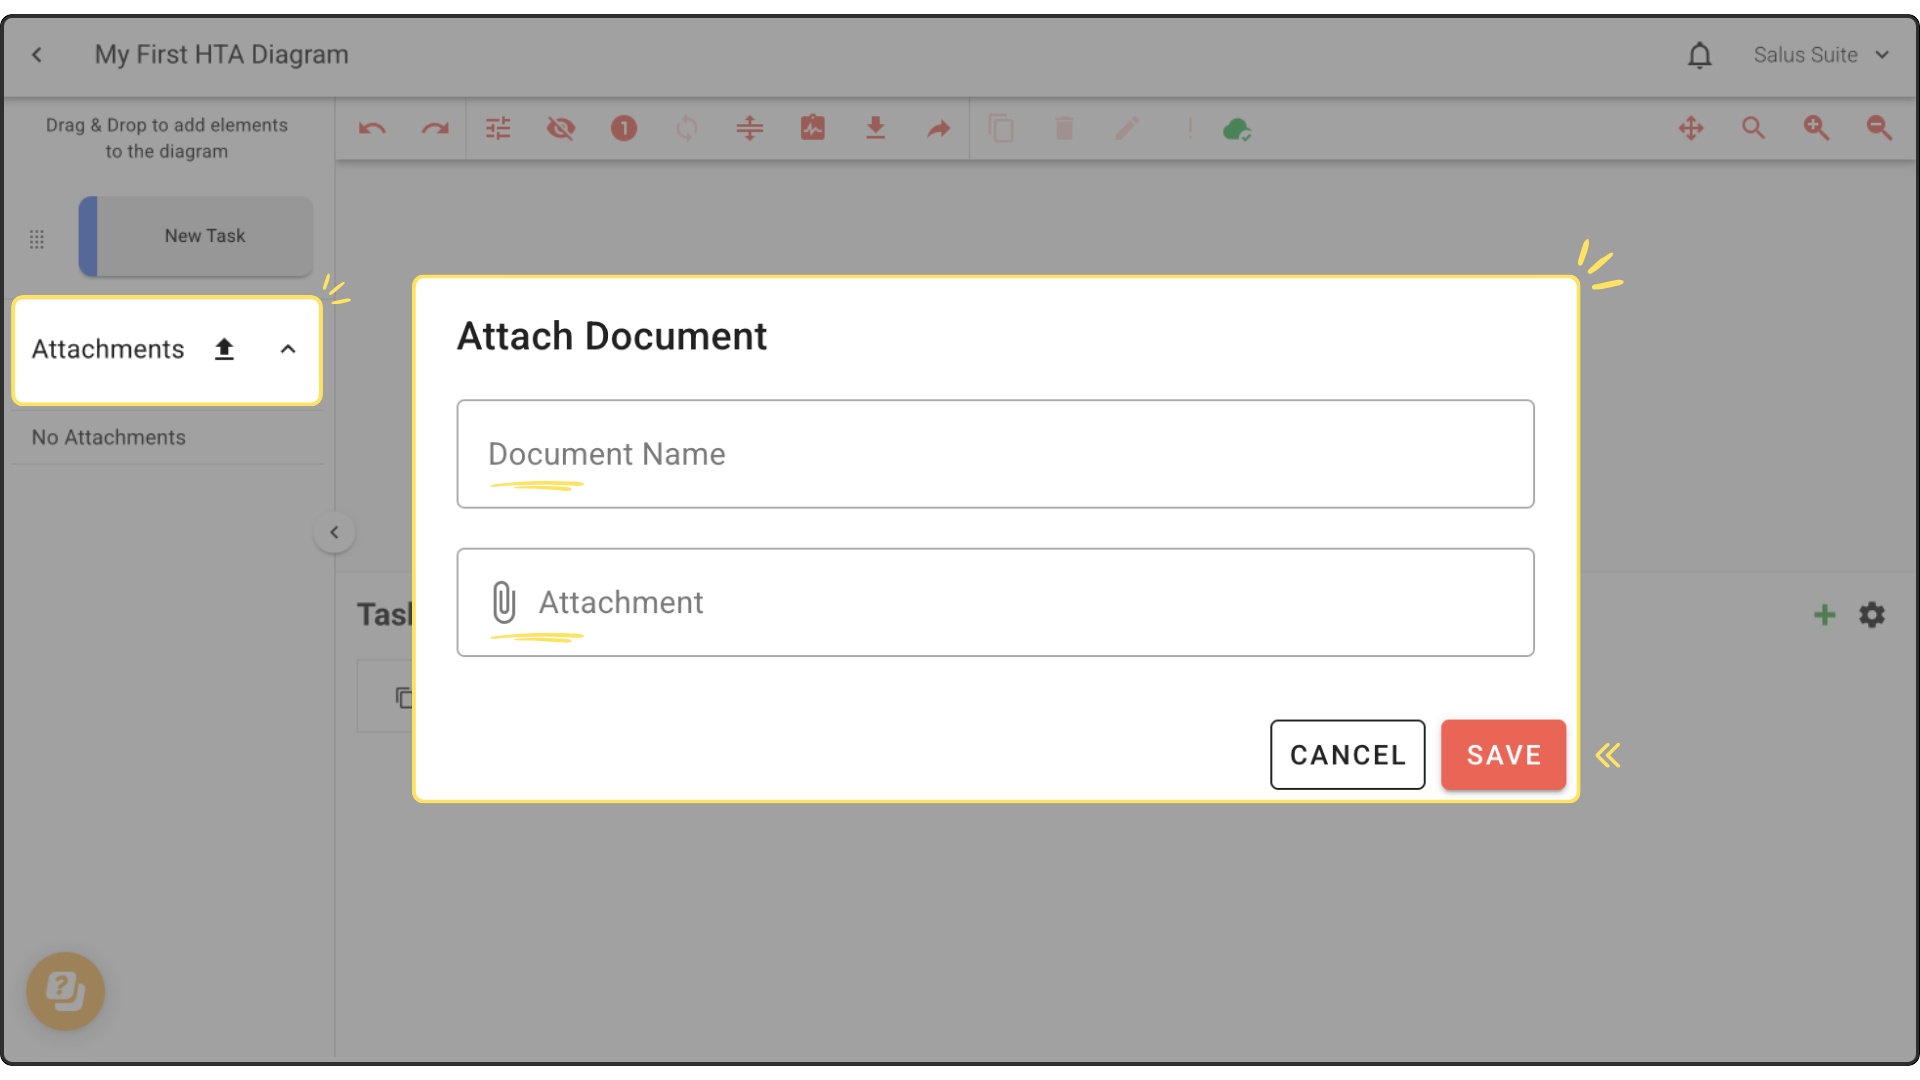
Step 1: Click the upload icon.
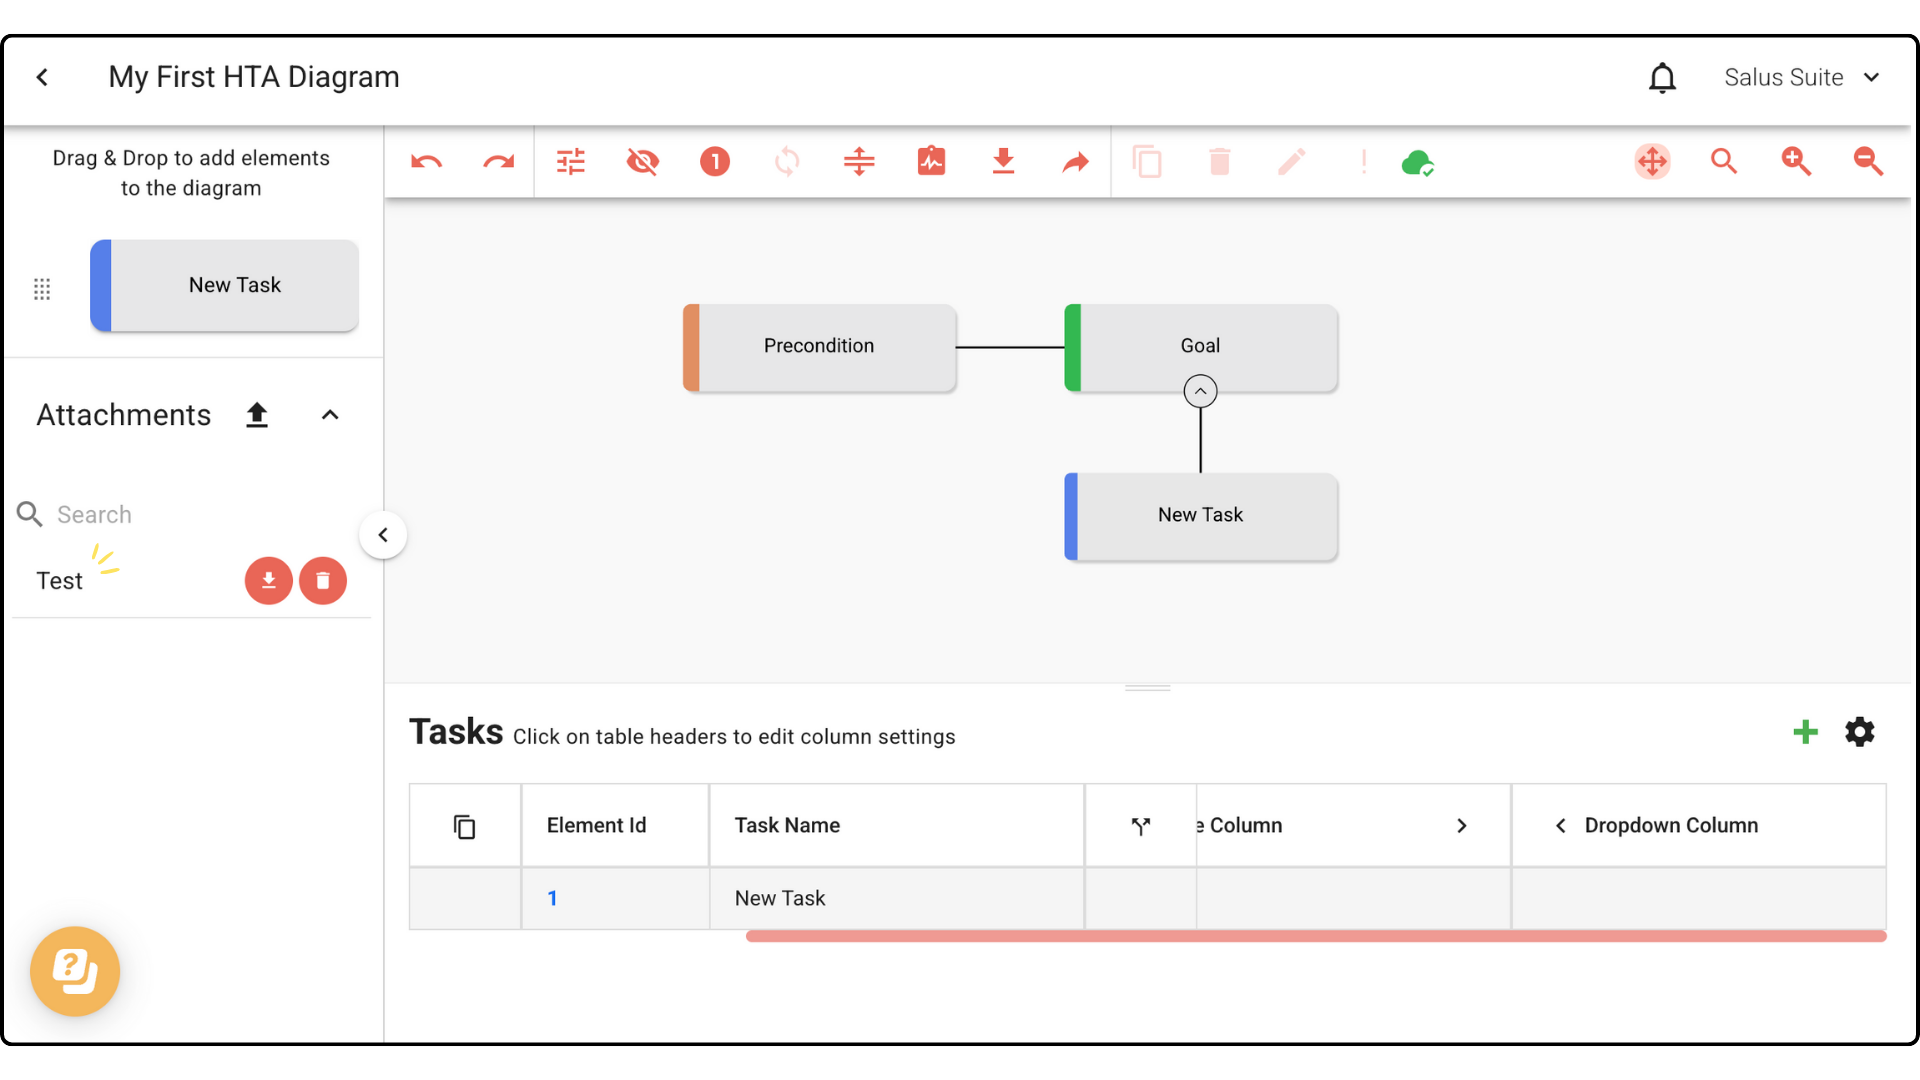
Step 2: Enter a Document Name, attach a file, then click SAVE. The attachment appears in the left-hand menu.