Diagram templates
Create custom templates to kick-start diagram creation across your team.
Information stored in a template overrides the Bowtie Master settings. Settings are only available to Organisation Admins.
Create a template
Step 1: Build out your template - a bowtie diagram, or just the metadata you want in the left-hand menu.
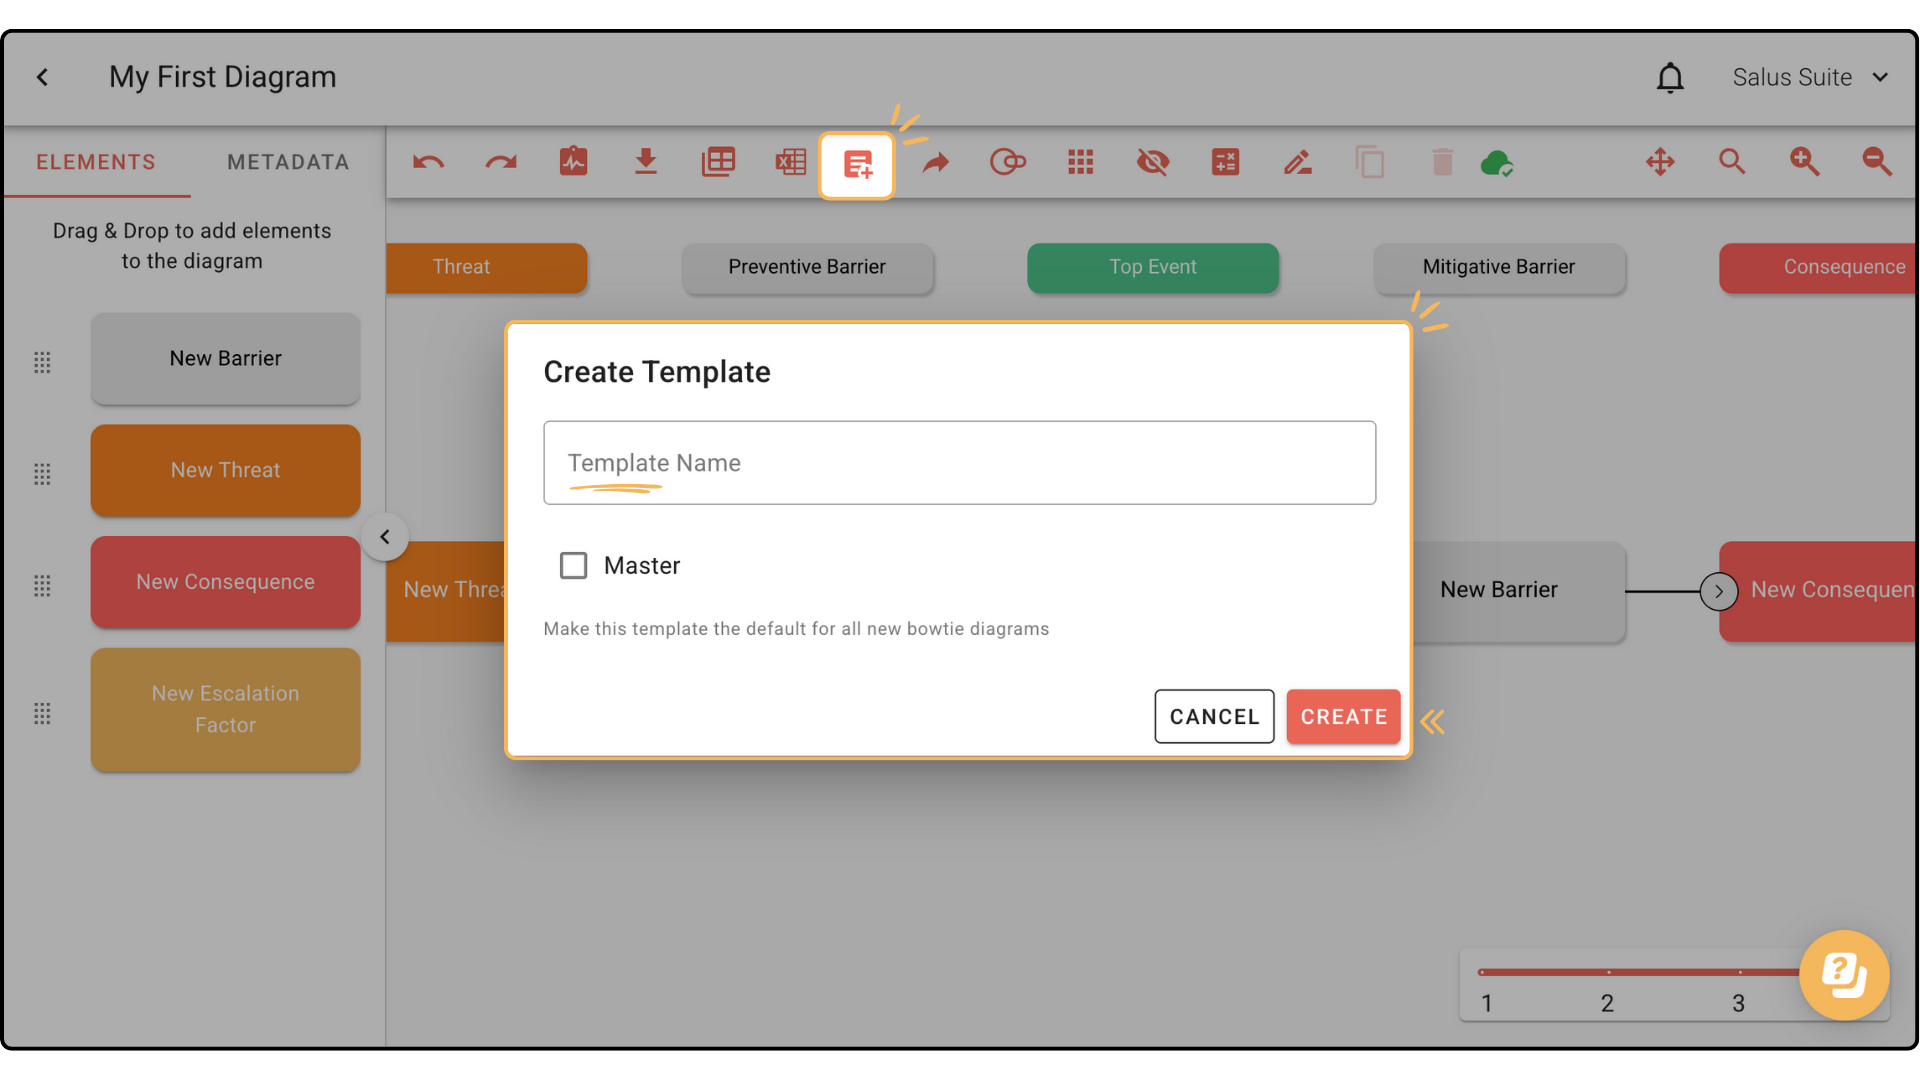
Step 2: Click SAVE AS TEMPLATE in the toolbar.
Step 3: Enter a name and click CREATE. To make it the default, tick MASTER.
Once created, the template is available to other users in your organisation’s Bowtie Master account. Learn how to add a new user.
Edit a template
A template can’t be edited directly. To update one, create a new diagram, assign the template you want to change, make your edits and save it as a new template.
Step 1: In the diagram builder, make your changes and save as a new template. Add a number after the title to tell the new template from the old.
Step 2: In the Bowtie Master settings (Organisation Admins only), you’ll see a list of all templates. Delete the old one.
Step 3: To rename the new template, click the name and type - for example, remove the number you added.
Step 4: The new template is now available when creating diagrams.
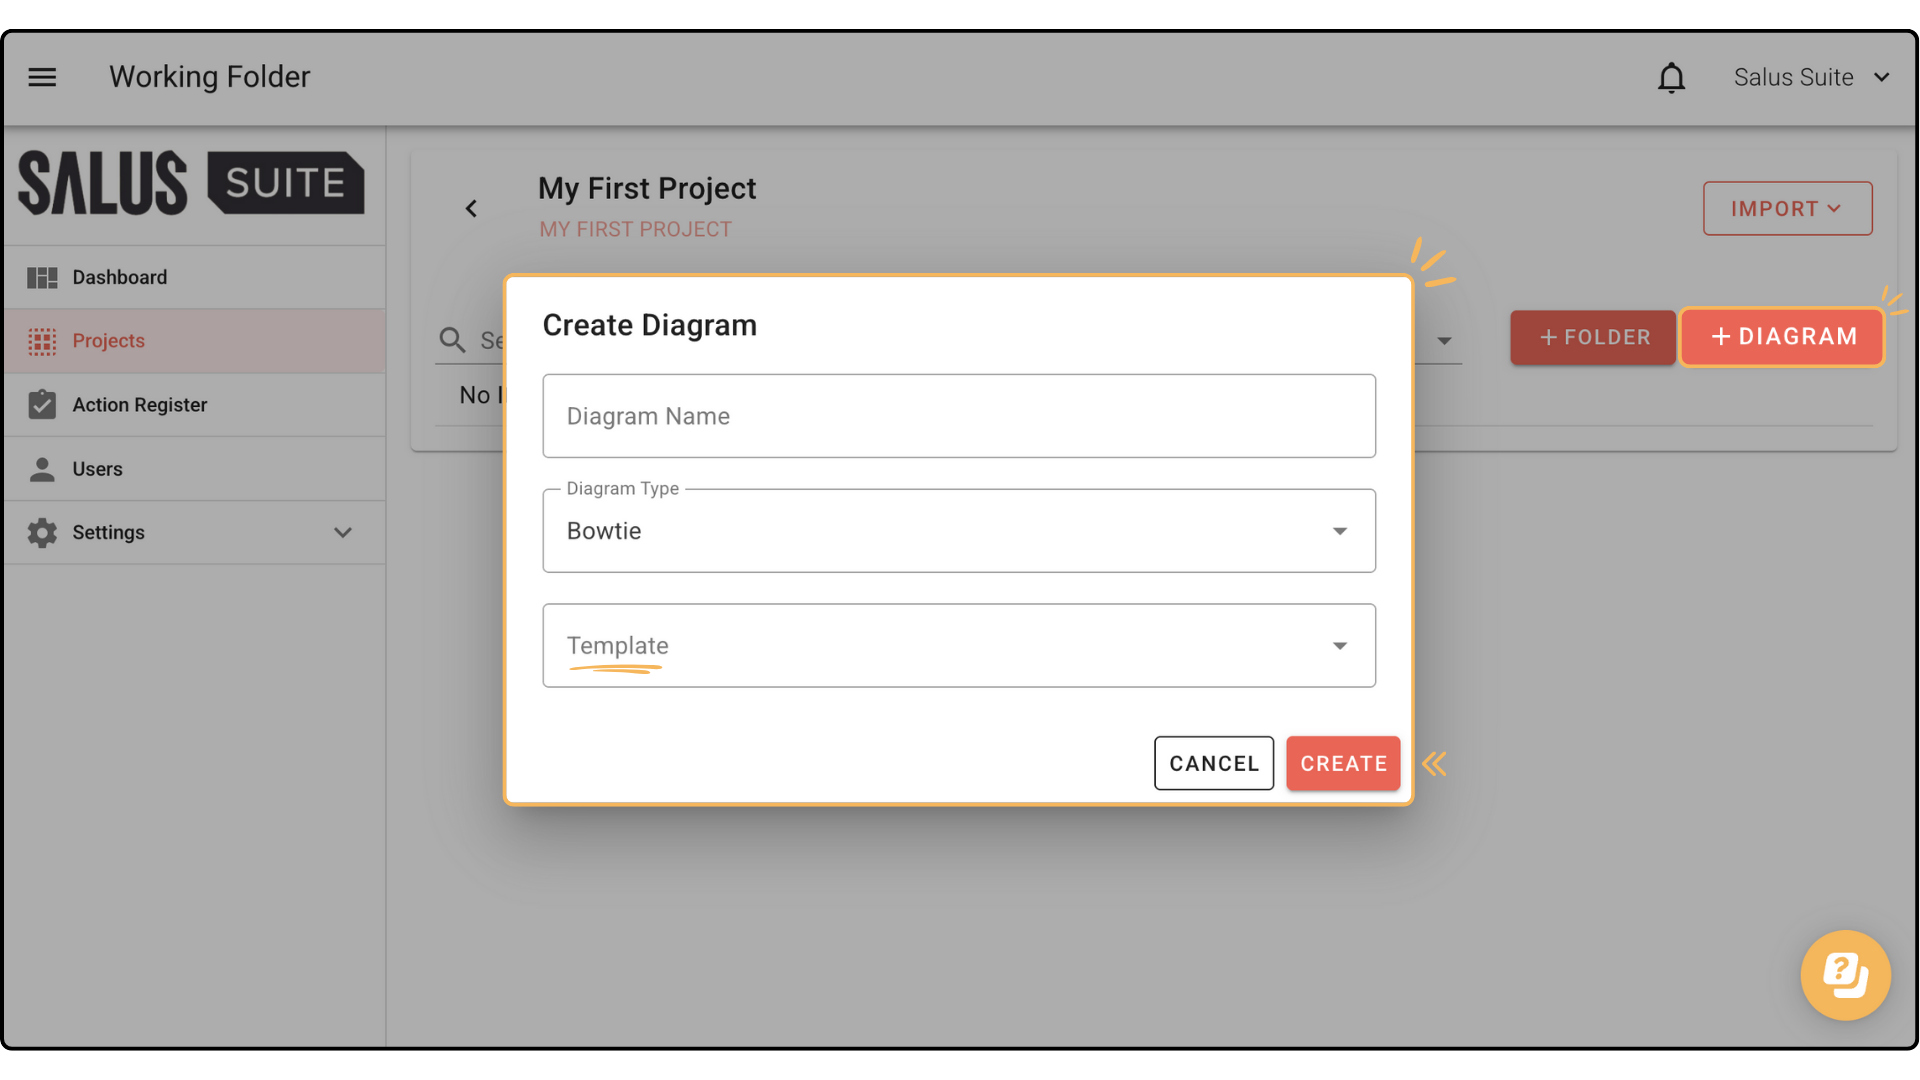
Use a template
In the Projects menu, click + NEW DIAGRAM, enter a name, select your template in the Template dropdown and click CREATE.
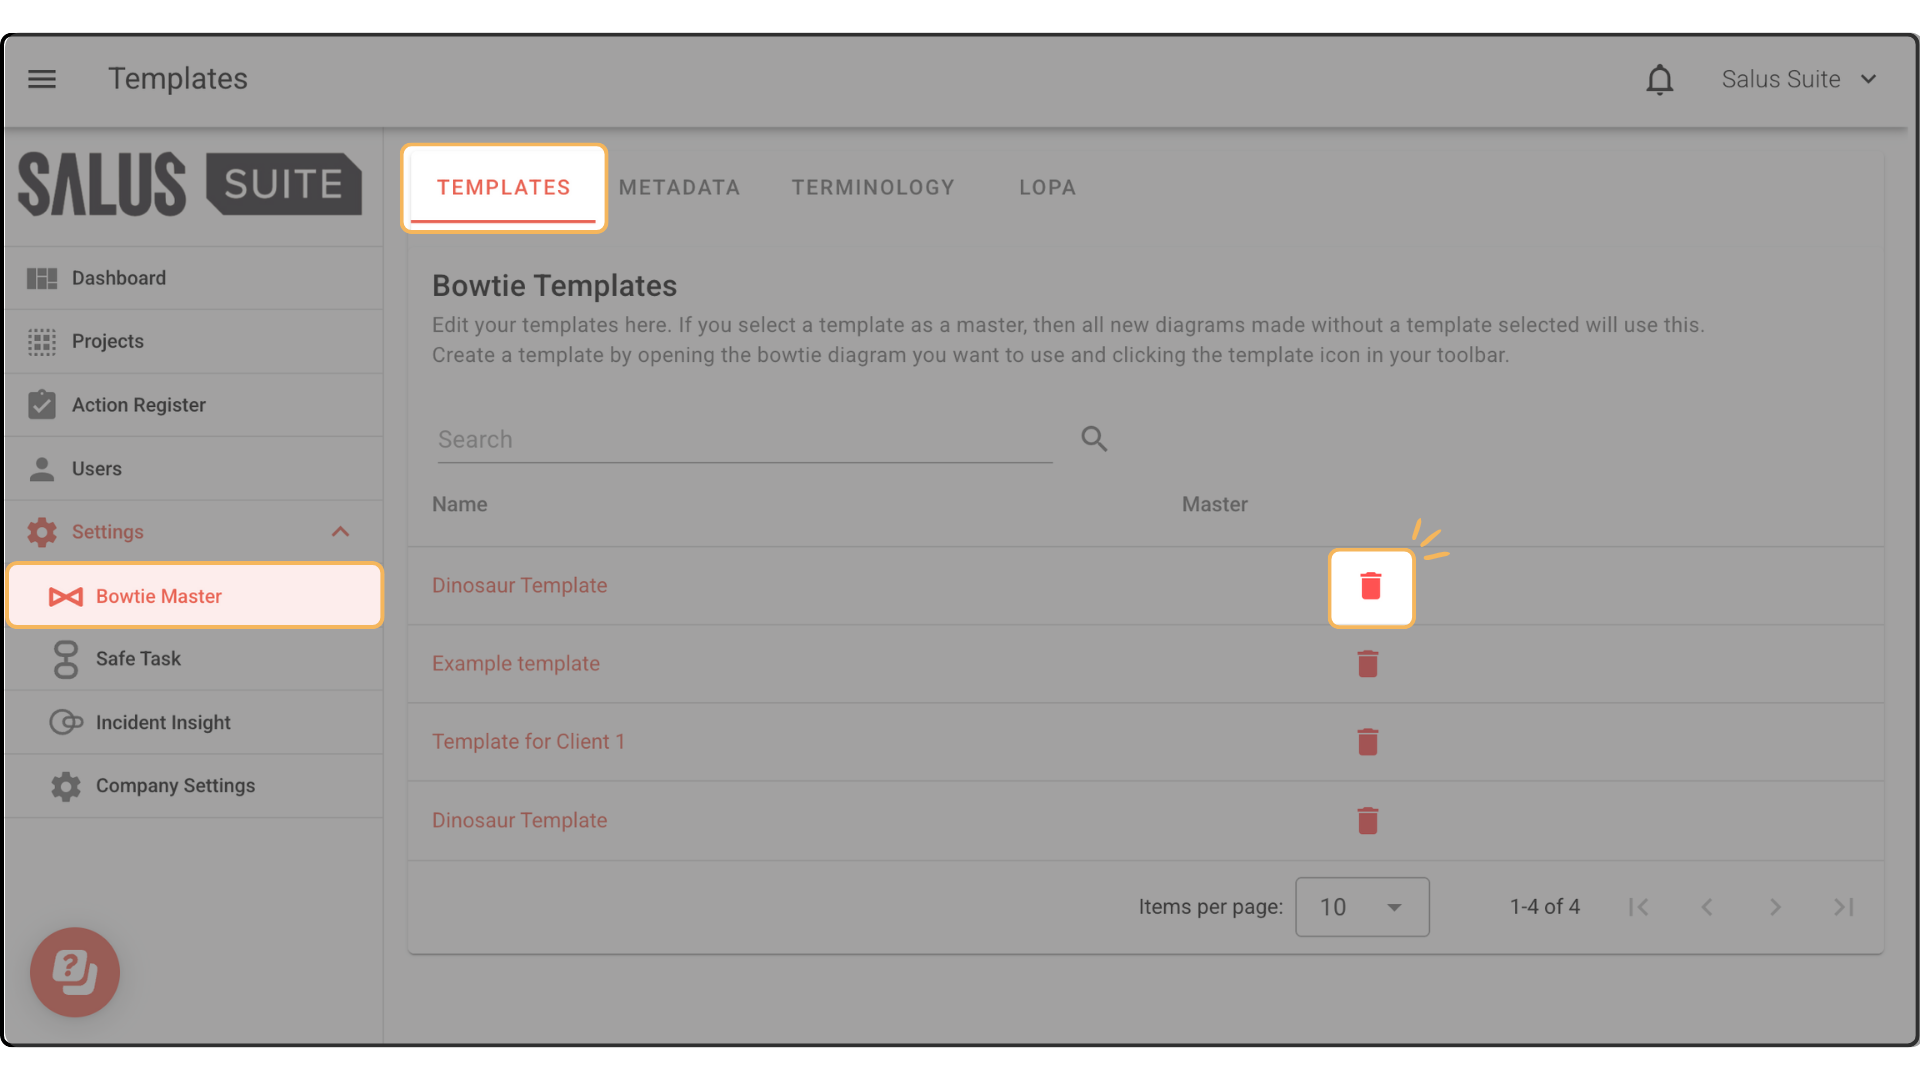
Delete a template
Only Organisation Admins can delete a template.
Step 1: Go to Settings > Bowtie Master > Templates.
Step 2: Click the delete icon beside the template you want to remove.